 0
0Advances in imaging technology should make amateurs give these cameras a second look.
By Dan Llewellyn in the May 2014 issue of Sky & Telescope
Planetary imagers these days routinely produce high-resolution photos of the Sun, Moon, and planets with high-speed video cameras. Most use a monochrome camera with individual color filters to record videos that then are stacked, sharpened, and combined into the final color image. But depending on your interests, you can eliminate the monochrome camera — with its complex filter wheels and expensive filters — and use a color video camera to record some of the highest-quality planetary images around.
Online imaging forums are almost universal in their recommendation to use a monochrome camera with separate red, green, and blue filters instead of a one-shot color (OSC) camera. That’s because color cameras are reputed to produce inherently lower-resolution images due to their filter matrix, known as the Bayer filter. That may have been true a few years ago, but changes in interpolation algorithms, chip sensitivity, and stacking software have made this problem a thing of the past.
Understanding Color Cameras
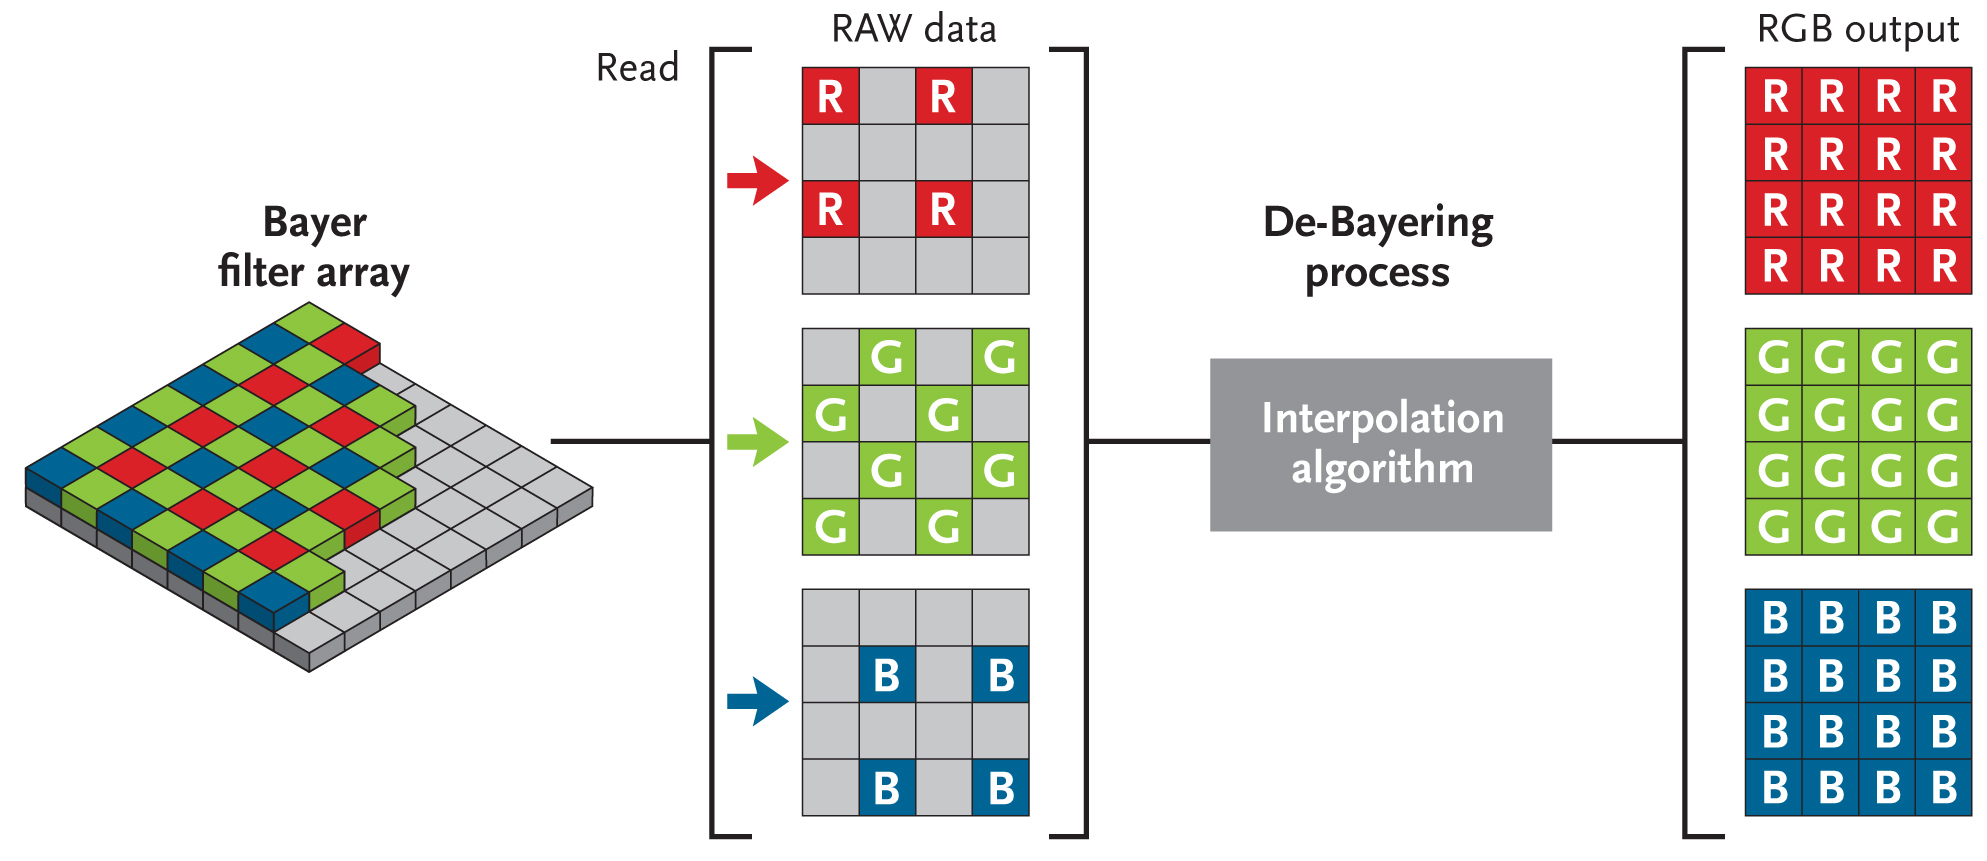
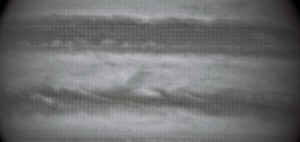
Both CCDs and CMOS sensors in all digital cameras start their lives as monochrome sensors. In order for a monochrome sensor to produce a color image, two things are necessary: a color filter array (CFA) permanently affixed over the sensor, and software to re-interpret the images as individual color channels. The vast majority of OSC cameras use the Bayer filter, named for its inventor, Bryce Bayer. This 4-pixel block of tiny color filters, arranged in a repeating grid of one red, two green, and one blue pixel over the entire sensor, was designed to mimic the human eye’s response to color and luminosity. The result is an image where 50% of the pixels are recorded though the green filters, 25% are red, and 25% are blue-filtered, all on the same grayscale image.
Your camera’s control software (or your preferred planetary stacking program) then separates the pixels into the three respective color channels and interpolates the “gaps” between the missing pixels on each channel to make a color image. This is where a popular misconception comes into play. A 4-pixel block that only samples one pixel in red should have the red information reduced by 75%, right? Wrong! Each pixel in an OSC camera reports information in all three color channels, regardless of which filter is over the pixel, when the image is run through an advanced debayering algorithm.
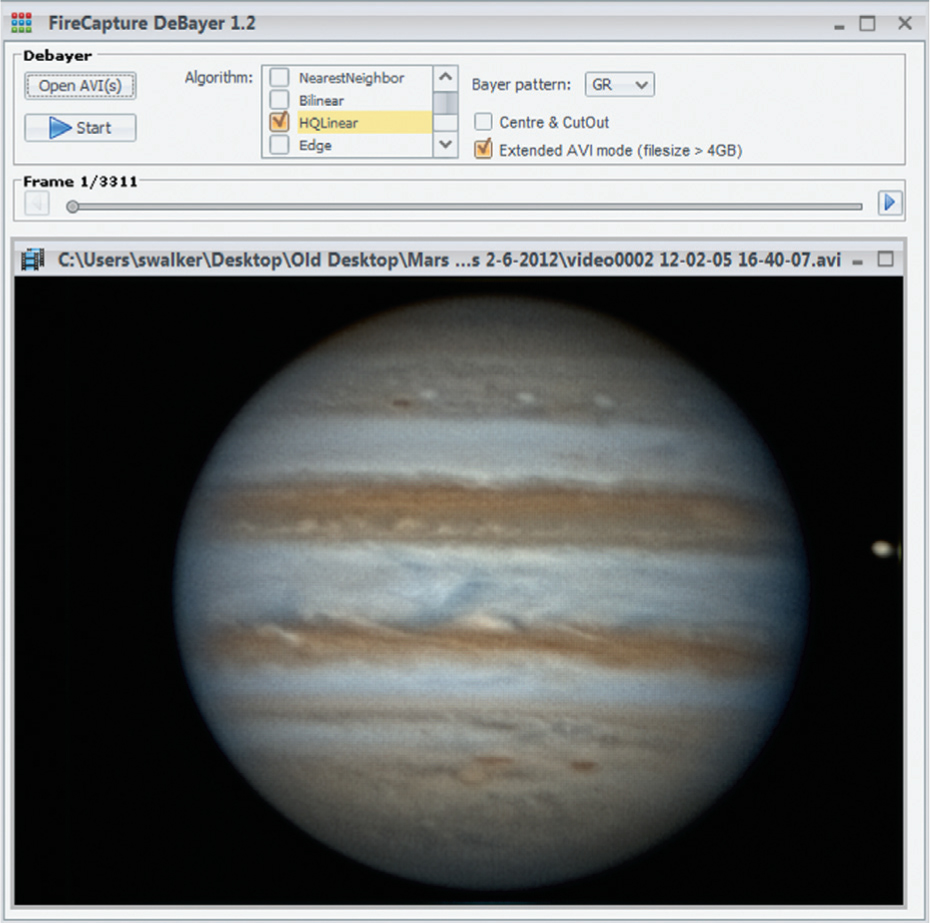
Color through Debayering
Dan Llewellyn
A debayering (or demosaicing) algorithm interprets the color information from an OSC camera to reproduce the luminance and chrominance of the imaged target. The oldest, fastest, and worst debayering algorithm for planetary imaging is known as nearest neighbor. It simply takes the missing pixel values from its adjacent pixels. So in a 4-pixel block (2×2 array), the green-filter pixels will copy the red and blue pixels’ luminance values next to it and mix them together to make an RGB value for each green pixel. This is repeated on the red and blue pixels. The process has the unfortunate side effect of producing color fringing, which is enhanced when you sharpen the image.
Fortunately, today’s high-speed color planetary cameras allow us to avoid the problems of nearest neighbor debayering. The easiest option is to record raw video files and then debayer them later during post-processing. Nothing is done to the values but a straight capture. On most models, this is done by recording using the Y800, Y1600, or FORMAT 7 video codecs.
Another option is to record in raw debayered mode.This feature debayers the video frames directly in your camera, which then streams a color video to your computer’s hard drive. Although this method enables you to use more advanced debayering before stacking, the option produces color video files that are much larger than a raw video and requires that you have a high-speed camera interface and a fast computer processor with lots of memory. (Roughly speaking, you’ll download three times as much data in debayered mode than in raw.)
Finally, most color camera models offer the option to record videos in “color space debayered” mode. This is done using the codecs RGB, YUV411, 422, or 444. This mode enables you to use a predetermined color space applied to the video stream. I prefer to apply the RGB color space to my videos, although YUV options allow for better separation of luminance and color information in the recorded video. Regardless of the color space you use, each requires adjustment to achieve a neutral color balance, and you must change the debayering method from nearest neighbor before you start recording.
When processing raw bayer-filtered video files, you need a stacking program that gives you options to utilize the newer debayering algorithms, specifically High Quality Linear and Directional Filter. Algorithms such as these are much more effective because they examine both larger blocks (8×8 and larger), rows, and columns of pixels to derive a more accurate trichromatic representation.

Dan Llewellyn
It should be noted that RegiStax (www.astronomie.be/registax), the venerable go-to program for stacking since the dawn of planetary video stacking, uses the nearest neighbor algorithm exclusively. So if you prefer to stack color videos using RegiStax, you’ll need to debayer the data before stacking. The free camera control software FireCapture (http://firecapture.wonderplanets.de) comes with a stand-alone program called Debayer.exe that rewrites your raw video file using a selection of advanced debayer algorithms. Additionally, the program PIPP (https://sites.google.com/site/astropipp) offers multiple debayer options. For best results, use either of these programs before stacking your video in RegiStax.
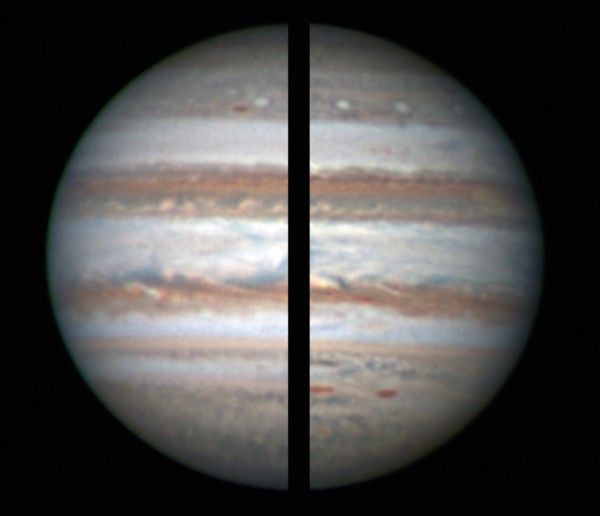
Another option for stacking raw videos is the program AutoStakkert!2 (www.autostakkert.com). This program uses the advanced algorithm Bayer drizzle, which doesn’t interpolate at all. Instead, it takes advantage of the drift in planetary videos to fill in the missing spaces between pixels with real data. This method undermines the myth of color cameras producing inherently lower resolution.
S&T: Leah Tiscione
At the Telescope: Using the Histogram
If you decide to image with a color camera, make sure you use the histogram tool when recording your videos. This feature displays a linear measurement of the signal in your video, enabling you to avoid overexposing the brightest regions. The histogram tool is critical for achieving color balance and exposure. If the control software that came with your camera does not have a live histogram tool, I recommend using FireCapture, which supports most popular camera models.
The benefit of using the live histogram is to let you adjust all three color channels to roughly equal levels, so that you can achieve a natural color balance. You’ll thereby set your white point, or color balance, for capture and ultimately produce more natural color-balanced images right from the start.
The histogram tools in FireCapture, IC Capture.AS, and FlyCap display the histogram as the 256 levels of gray on a standard 8-bit video display. Using this scale, I prefer to expose my videos to peak between roughly 64 and 96, or about 25–33% of the histogram. Exposing to much higher levels can lead to overexposure of the brightest areas of your target, which is impossible to recover during post-processing. In order to get the histogram within this range, you need to adjust your exposure. The image will look dim on your laptop monitor, but this is inconsequential: you can brighten the image during stacking
Exposure, Gain, and Frame Rate
Dan Llewellyn
Here’s where it’s important to understand the relationship between exposure, gain, and frame rate. You adjust the maximum intensity of the image by varying the exposure of your camera, which is the time the electronic shutter in your camera is exposing each frame. Frame rate is defined as how many pictures the camera can take in a second (fps). So there is an inverse relationship between the camera frame rate and exposure — the higher the frame rate used, the quicker the shutter has to be. This means if you’re using a high frame rate, you’ll need to increase the electronic gain to boost the image signal to keep it properly exposed.
Dan Llewellyn
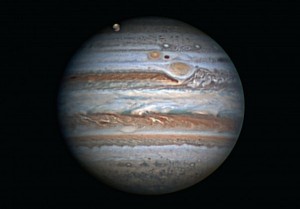
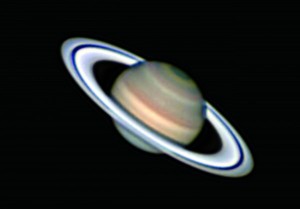
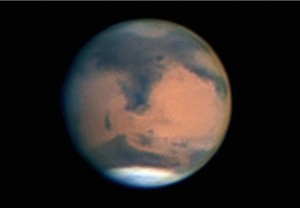
But be warned: gain adds electronic noise. For a color camera, you should limit the gain increase to as little as possible. I suggest using a modest frame rate to keep the gain settings low. When imaging through my Celestron C14 and my Point Grey Research Flea3 video camera, I use 15 fps when imaging Saturn, 20 to 30 fps for Jupiter, and 30 to 40 fps when shooting Mars. It’s much easier to stack 1,000 properly exposed video frames with low noise levels than 3,000 noisy, gain-amplified frames.
Dan Llewellyn
Additional Benefits
Perhaps the biggest advantage to using a color camera is that all the color channels are in focus. There is no need to waste time refocusing each filter, as you must when imaging with monochrome cameras. This is a major advantage when imaging Jupiter, because the planet’s rapid rotation limits you to about 2 minutes of capture — longer, and you’ll lose fine detail in your image due to motion blur.
Color cameras also provide a relatively easy learning curve compared with tri-color imaging, not to mention they avoid the expense of purchasing a filter wheel and a set of color filters. Unless you’re interested in isolating the near-infrared wavelength of methane in Jupiter’s atmosphere, a monochrome camera is simply unnecessary for capturing excellent photos of the planets.
So whether you’re about to try your hand at planetary imaging or you’re contemplating a camera upgrade, consider testing a new color planetary camera yourself. You may find the benefits outweigh any perceived drawbacks.
 Dan Llewellyn observes and images the planets from his home in Decatur, Georgia.

Comments
You must be logged in to post a comment.