 0
0Learn to see more detail on Jupiter by drawing at the eyepiece.
By Michael Rosolina in the Sky & Telescope January 2014 issue
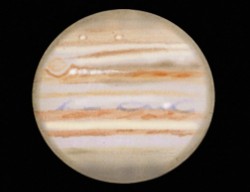
Jupiter is consistently one of the most exciting subjects to observe in the solar system. Its large apparent size makes it a prime target for observers with almost any size telescope. But besides the two dusky equatorial bands that are usually visible, the planet’s cloud tops are relatively low contrast, making it a challenge to glean the most out of the view.
One way to improve your chances of detecting small-scale features and subtle color variations is to train your eye to see better with lots of practice. The best method to do that is by sketching the planet while observing.
Sketching forces you to carefully examine a feature and then record it on paper. The longer you focus on an area, the easier it becomes to distinguish delicate contrasts between features, or detect small storms in the planet’s many belts and zones. This month Jupiter is at its best for the year, so it’s a great time to try your hand to become a better observer through sketching.
Preparation: The Key to Success
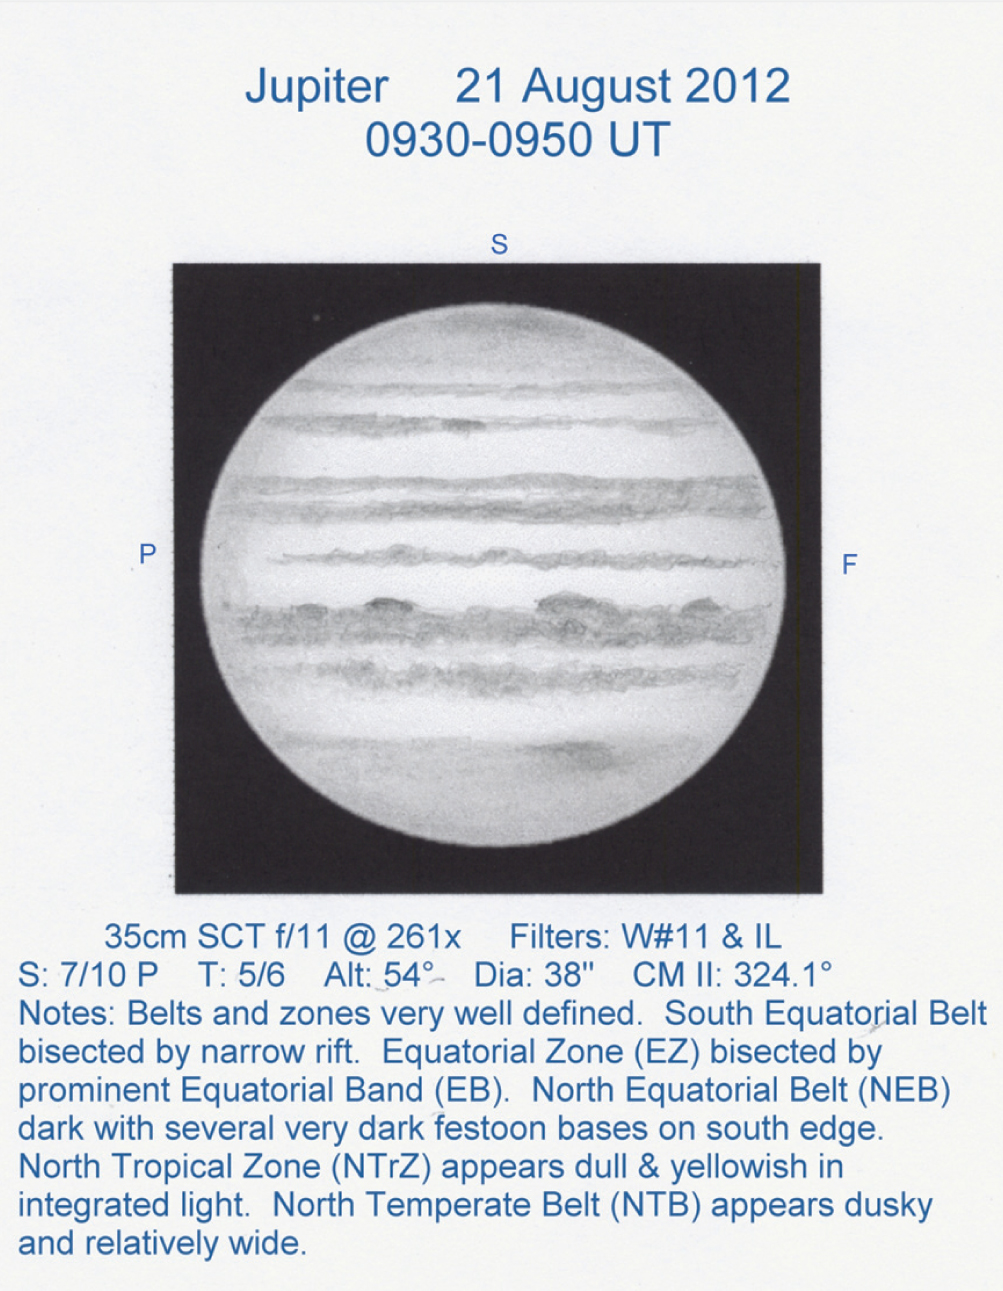
Michael Rosolina
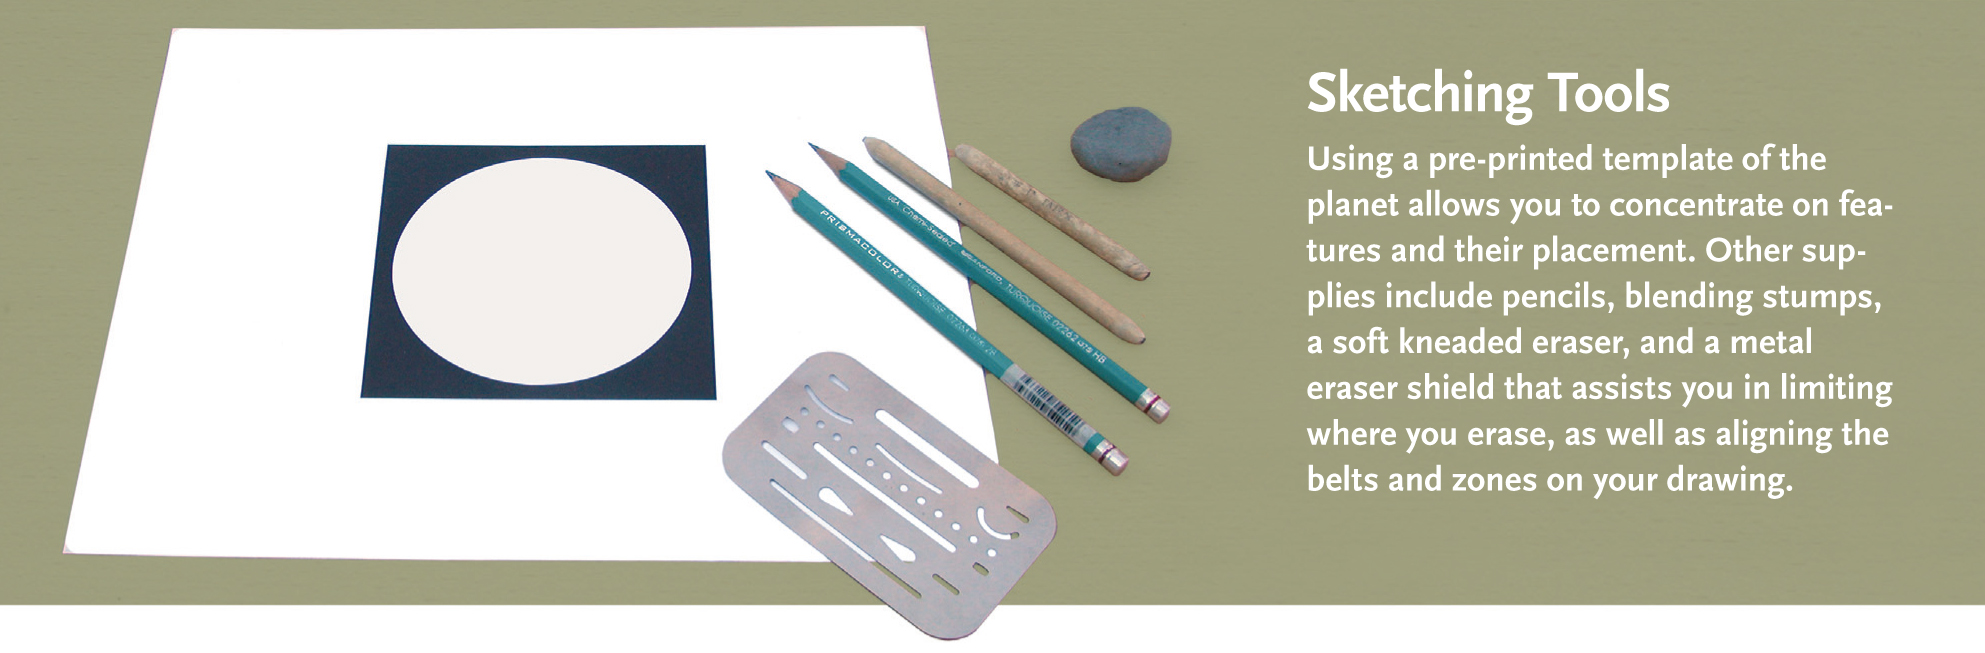
Before starting, you’ll need some drawing supplies. Planetary sketchers often use a pre-printed template that has the planet’s oblate shape already in place, as well as lines to record important details of the observation, such as the date, time, conditions, and instrument used. You can download these from planetary observing groups’ websites, including those of the Association of Lunar and Planetary Observers (www.alpo-astronomy.org), the British Astronomy Association (http://britastro.org/baa), and even some internet forums such as Cloudy Nights (www.cloudynights.com). Using a template enables you to concentrate on your target region of the planet without having to fuss with getting the shape of the planet correct. A template also provides a standardized form that is accepted by each of these observing groups, allowing you to contribute your observations to historical records when complete.
You’ll also need some pencils or other form of drawing tool. Graphite pencils come in different degrees of hardness; your standard No. 2 pencil will work fine. Multiple grades of pencil hardness are available through art supply stores. Additionally, you should have an eraser besides the one attached to your pencil. I use a kneaded eraser, which is a type of soft eraser that enables you to mold it quickly into any shape to erase very small areas.
You’ll also need a clipboard or a table and a comfortable observing chair: it’s easiest to concentrate on your view if you can be seated while observing. Finally, a battery-operated light of some kind is a must. Because Jupiter is so bright, you don’t have to preserve your night vision, so a white light is best (it’s a requirement if you are drawing in color at the telescope).
This year, the best part of Jupiter’s apparition occurs in the winter for Northern Hemisphere observers, so you’ll need to dress warmly. I can’t draw with gloves on, so I keep a couple of chemical hand warmers in my pockets. Fingerless gloves or pull-back mittens are also good options to keep your hands warm while drawing.
Getting Down to Business
Now that you have everything ready, spend a few minutes soaking in the view before starting your sketch. This gives your eyes time to get used to the subtle contrasts and pastel hues of the planet’s belts and zones. There is so much to see on Jupiter that trying to draw the entire planet can be difficult, if not impossible, under excellent seeing. Jupiter’s rapid rotation of 9.9 hours to complete a single “day” causes features to move position in just a few minutes, so you’ll have to sketch quickly to capture the most detail. A guide to observing Jupiter appears on page 50.
One feature often overlooked on most planets is the slight darkening of the planet’s limb. When the planet is near quadrature, one limb will have more pronounced limb darkening than the other.
Because of the relatively low contrast of Jupiter’s cloud tops, it’s usually best to resist the temptation to employ high magnification. Depending on seeing conditions, I find a magnification range of roughly 200 to 260× gives the best balance between scale and sharpness in most cases. In poor seeing I rarely go higher than 160×, because above that the image becomes too soft.
In addition to looking at cloud-top features, check for one or more of the Galilean moons or their shadows transiting the face of the Jovian disk. All of the moons can be seen as they ingress and egress the Jovian limb. An article on observing Galilean moon transits appears on page 54.
After you’ve taken time to study Jupiter, it’s time to begin your sketch. It’s important to work fast because of Jupiter’s high rotation rate — 15 to 20 minutes is about all you have before features have moved significantly.
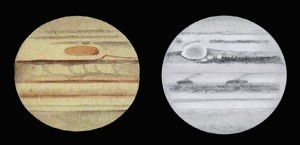
Michael Rosolina
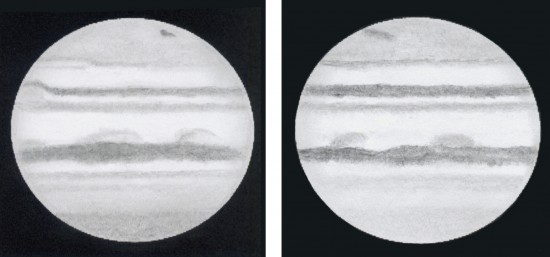
Begin by noting your start time in Universal Time (UT), and then start lightly drawing in the two main equatorial belts with your pencil to anchor your sketch. Add as many of the narrower belts and zones to the north and south as are visible in order to rough out the entire disk. Once this initial sketch is complete, go back to the main belts and shade in darkness along their north and south edges. The kneaded eraser comes in very handy to quickly carve out rifts within the belts, as well as to refine irregularities along their edges. Use your pencil with harder pressure to shade in any dark knots, barges, or other concentrations, and less pressure to lightly shade in any wispy festoons. Do the same thing with the narrower belts and zones, which have their own variations of shading and brightness. Use your kneaded eraser shaped to a point to render any bright ovals you see. There is often less detail near the limbs due to foreshortening and limb shading, so concentrate your efforts on features seen well away from these areas.
You’ll have an additional challenge if the Great Red Spot (GRS) is visible during your observing session. Portraying it accurately can be a little tricky. Just like the belts and zones, the longer you look, the more you’ll see. There are often subtle gradients within the famous elliptical storm. In addition, the GRS is sometimes surrounded by a white or light-colored “cavity” in the south edge of the South Equatorial Belt (SEB) known as the Red Spot Hollow.
To finish up the sketch, double check the positions and proportions of the various features you have recorded. Use your eraser to remove or lighten features where needed. For more control, you can press or roll the kneaded eraser instead of rubbing on the places you want to lighten. There are mostly no hard edges in the cloud tops of Jupiter, so you may need to soften the boundaries between the belts and zones by lightly blending. You can use your finger to blend adjacent light and dark areas, or use a tightly rolled stick of paper called a blending stump. Blending is also an easy way to depict limb darkening. Note the time you finish the drawing, and you are done.
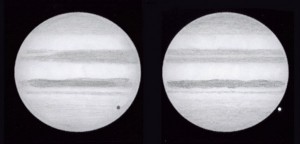
Michael Rosolina
Strip Sketching
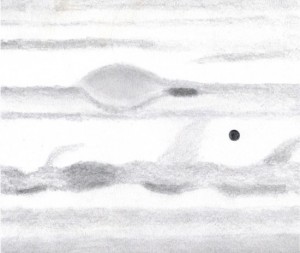
An innovative technique that you can employ to sidestep the difficulties of Jupiter’s rapid rotation is known as a strip sketch. With the strip sketch, you use a blank sheet of drawing paper instead of the oblate disk template. Start this drawing as close to the preceding limb as you can, and continue from there toward the planet’s central meridian (CM). Once you’ve reached the CM, you can simply add features as they cross the CM successively. Using this method, you let Jupiter’s rotation work for you,and you can continue working on the drawing for as long as you observe the planet that evening. Be sure to note the start and end time so you can figure out how many degrees of longitude you have recorded.
I often try to include some additional information, such as my observing conditions, unusual colored areas, or interesting occurrences during the session. Additionally, I indicate the direction of south or north in the drawing, the direction of the planet’s rotation, and the magnification used. I always include the System I and System II longitudes in order to track the positions of features I recorded. Depending on your personal preference, you can also add the planet’s altitude and diameter at the time of the observation.
Michael Rosolina
The final step with your drawing, whether it is an extended strip sketch or a full disk sketch, is to preserve and share it. Drawings are usually preserved using spray fixative to keep the media from smudging or rubbing off (hair spray is an alternative). Many sketchers like to scan their work and use image-processing software to adjust the contrast, add color, mirror-reverse, or replace their handwritten notes with clean type. The sketch is then ready to share in online forums or the planetary observers’ associations mentioned earlier.
You now have a visual record of your observation and, more importantly, you have taken a huge step in training your eye to bring your observing talents up to a higher level. Good luck with your Jupiter sketch in this and future apparitions!
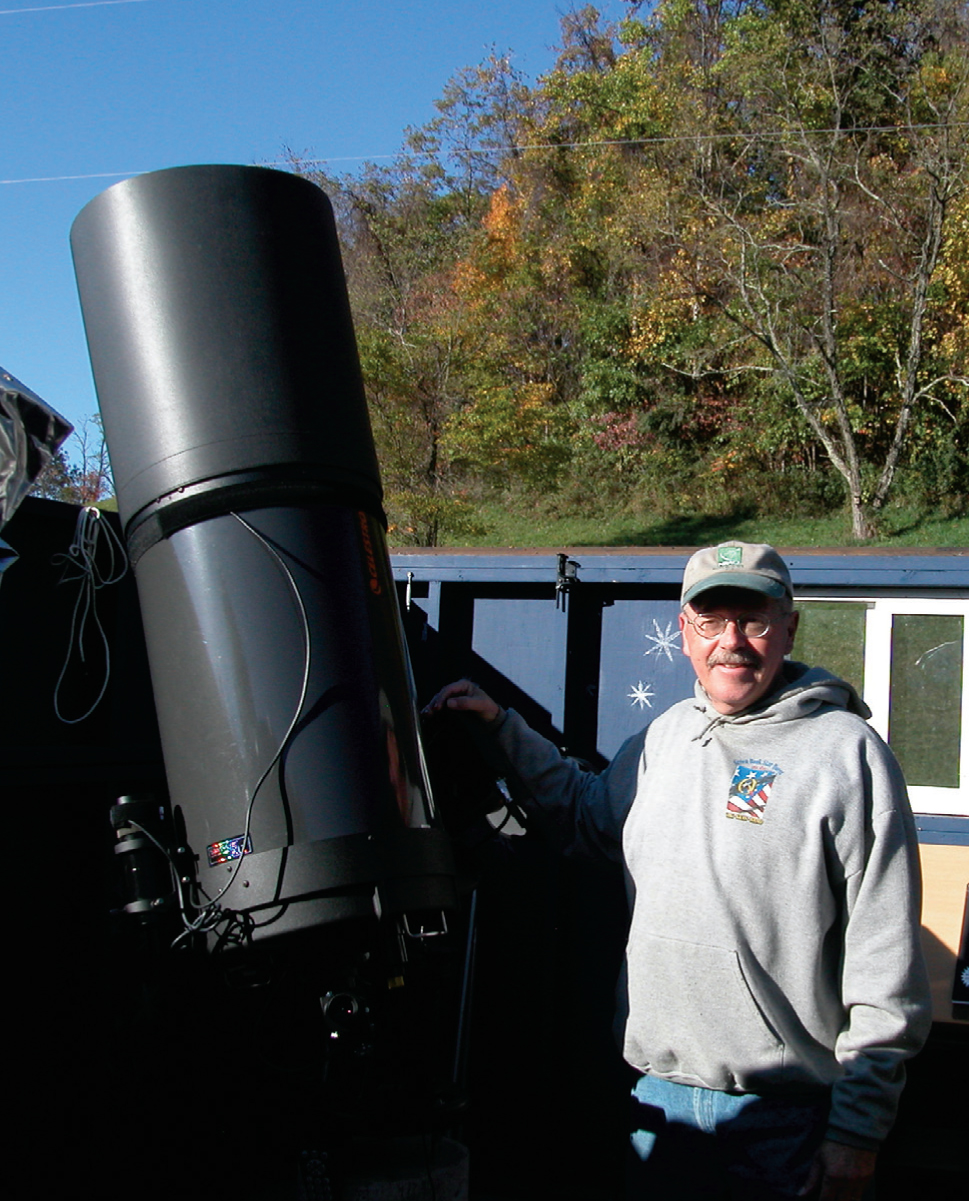 Michael Rosolina observes Jupiter with a Celestron C14 from the dark skies of Greenbrier County, West Virginia.

Comments
You must be logged in to post a comment.