 1
1Follow these simple suggestions to get the most out of your CCD images.
By Warren Keller in the Sky & Telescope December 2012 issue
The 5 S's of CCD Imaging
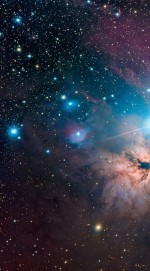
Signal
Great astrophotography is all about signal, and having lots of it. Producing beautiful astrophotos today is done by making many short individual exposures (known as subframes) and combining them into master files. In this way, a faint signal from an astronomical target accumulates on a CCD, while the random electronic noise associated with digital exposures is reduced.
Obtaining quality signal isn’t easy, but once you’ve mastered the technique of shooting sharply focused images with nice, round stars, you’re ready to move ahead with gathering good signal. Whether you acquire the exposures with a one-shot color (OSC) CCD camera, a DSLR, or through separate color filters and a monochromatic CCD camera, you need to calibrate and then stack them. Stacking is a metaphor for digitally combining multiple exposures.
Warren Keller
Subtract
Besides the “light” exposures of your target, you need additional exposures so that you can properly calibrate the light frames before stacking them. These exposures include dark frames, bias frames, and flat-field images. Let’s have a look at what each of these shots accomplish and how they make your final results better.
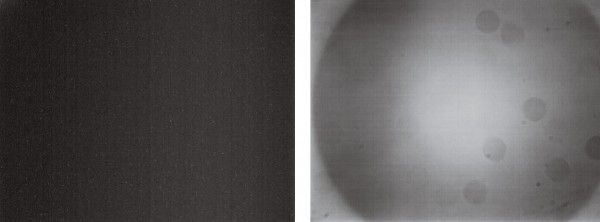
Because most astronomical subjects beyond our solar system are exceedingly faint, it takes many minutes of exposure to accumulate enough signal to detect their dimmest regions. During these long exposures, your digital camera generates thermal noise that appears as snowy dots all across your image. Fortunately, this unwanted noise is predictable and can be minimized by subtracting what is known as a dark frame.
Dark frames are exposures made with the camera or telescope objective covered, so that no light reaches the detector and only the camera’s thermal signal is recorded. To be effective, dark frames must be taken with the same conditions — exposure duration, detector temperature, and pixel binning mode — as the light frames they are meant to calibrate. When many dark frames are recorded and combined to make a master dark frame, and that master is subtracted from each individual light exposure, it removes the majority of the snowy dots of thermal signal.
In the case of low-noise chips such as Sony’s Super HAD CCD detectors, darks have been shown to be redundant and may actually contribute noise. Rather than use dark frames for calibration, you can often process an image from these detectors using a defect map of the sensor’s hot pixels. Hot pixels appear as bright specks in an image. Every sensor has them, and they become especially problematic during image stacking. Some image-processing software can use a sensor’s defect map to eliminate bad pixels by filling them with an average value from the surrounding pixels. In this case, the result is better than a dark-frame calibration, as darks merely subtract the hot pixels, leaving a black pixel.
Warren Keller
Because flat-field frames for image calibration can be tricky, they are often the last ones to be conquered by new imagers. Just as darks and biases are portraits of the flaws in the camera’s electronics, flats are a portrait of the anomalies in the optical system. In some cases, you can dispense with flats, but when uneven illumination and dust particles are visible in your light images, the best way to correct them is by using flats.
Flat-field frames are exposures made with your telescope pointed at a blank, evenly illuminated target. They should have an exposure duration that produces pixels with an average brightness value of one-third to one-half of the camera’s specified saturation level (this value is easily read by software). Light boxes and electroluminescent panels with adjustable brightness settings are increasingly popular devices for making flat-field exposures, as Peter Kalajian explained in his article in the March 2011 issue, page 72. Just like light exposures, you should record and calibrate your flat-field images with multiple dark frames recorded at the same temperature and duration.
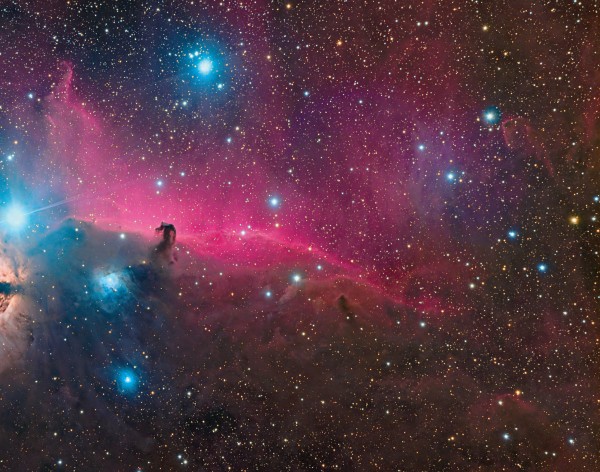
Stacking
Warren Keller
Once you’ve completed calibration of your light frames, you can move on to combining them. If you’re imaging with an OSC camera, you should debayer (color convert) the individual subexposures, transforming the grayscale images into color pictures, before stacking. The individual subexposures should now be aligned, since it’s inevitable that a slight image drift will occur between subexposures, making the same bit of image detail fall on different pixels in each frame. Drift sometimes includes field rotation as well as simple translation. Most astronomical image-processing programs include some method to align images by matching star patterns in each image with subpixel accuracy. Once the images are aligned, the files are ready to be stacked into a master.
Software typically offers several methods to combine subexposures, with sum, average, median, and sigma reject being the most common. Because of some inevitable random signal present in many images (such as cosmic ray artifacts or satellite and airplane trails), the sum and average methods are not my first choice because they include these artifacts in the stacked result, though they produce the highest signal. To deal with these anomalies, you should use a statistical-rejection method. Median combine removes many of these image artifacts, but it produces a grainy result. Most imagers choose a sigma-rejection stacking method, essentially an excellent compromise between average and median combine. Sigma-reject stacking checks to see if a given pixel’s brightness value is relatively similar in a majority of the subexposures, and rejects any pixel value that is beyond the standard deviation of the majority.
In the case of one-shot color cameras, the stacked image is now ready for post-processing. Images recorded through separate color filters with a monochromatic camera require a few more steps. Separate red, green, and blue master files (and unfiltered luminance images) have to be aligned and stacked independently. You create the color image by aligning and combining these color-filtered stacks into a master RGB image called a chrominance. Although the chrominance image provides the beautiful color, it’s the luminance image (shot without color filters) that can contribute some of the sharpest detail. Your CCD image-processing software can combine luminance and chrominance, but it’s often best to reserve this step for other post-processing software such as Adobe Photoshop, which provides better control over both components.
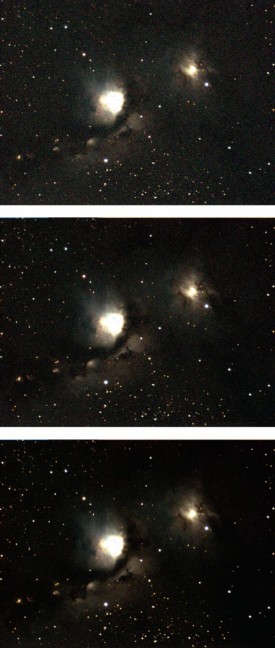
Stretching
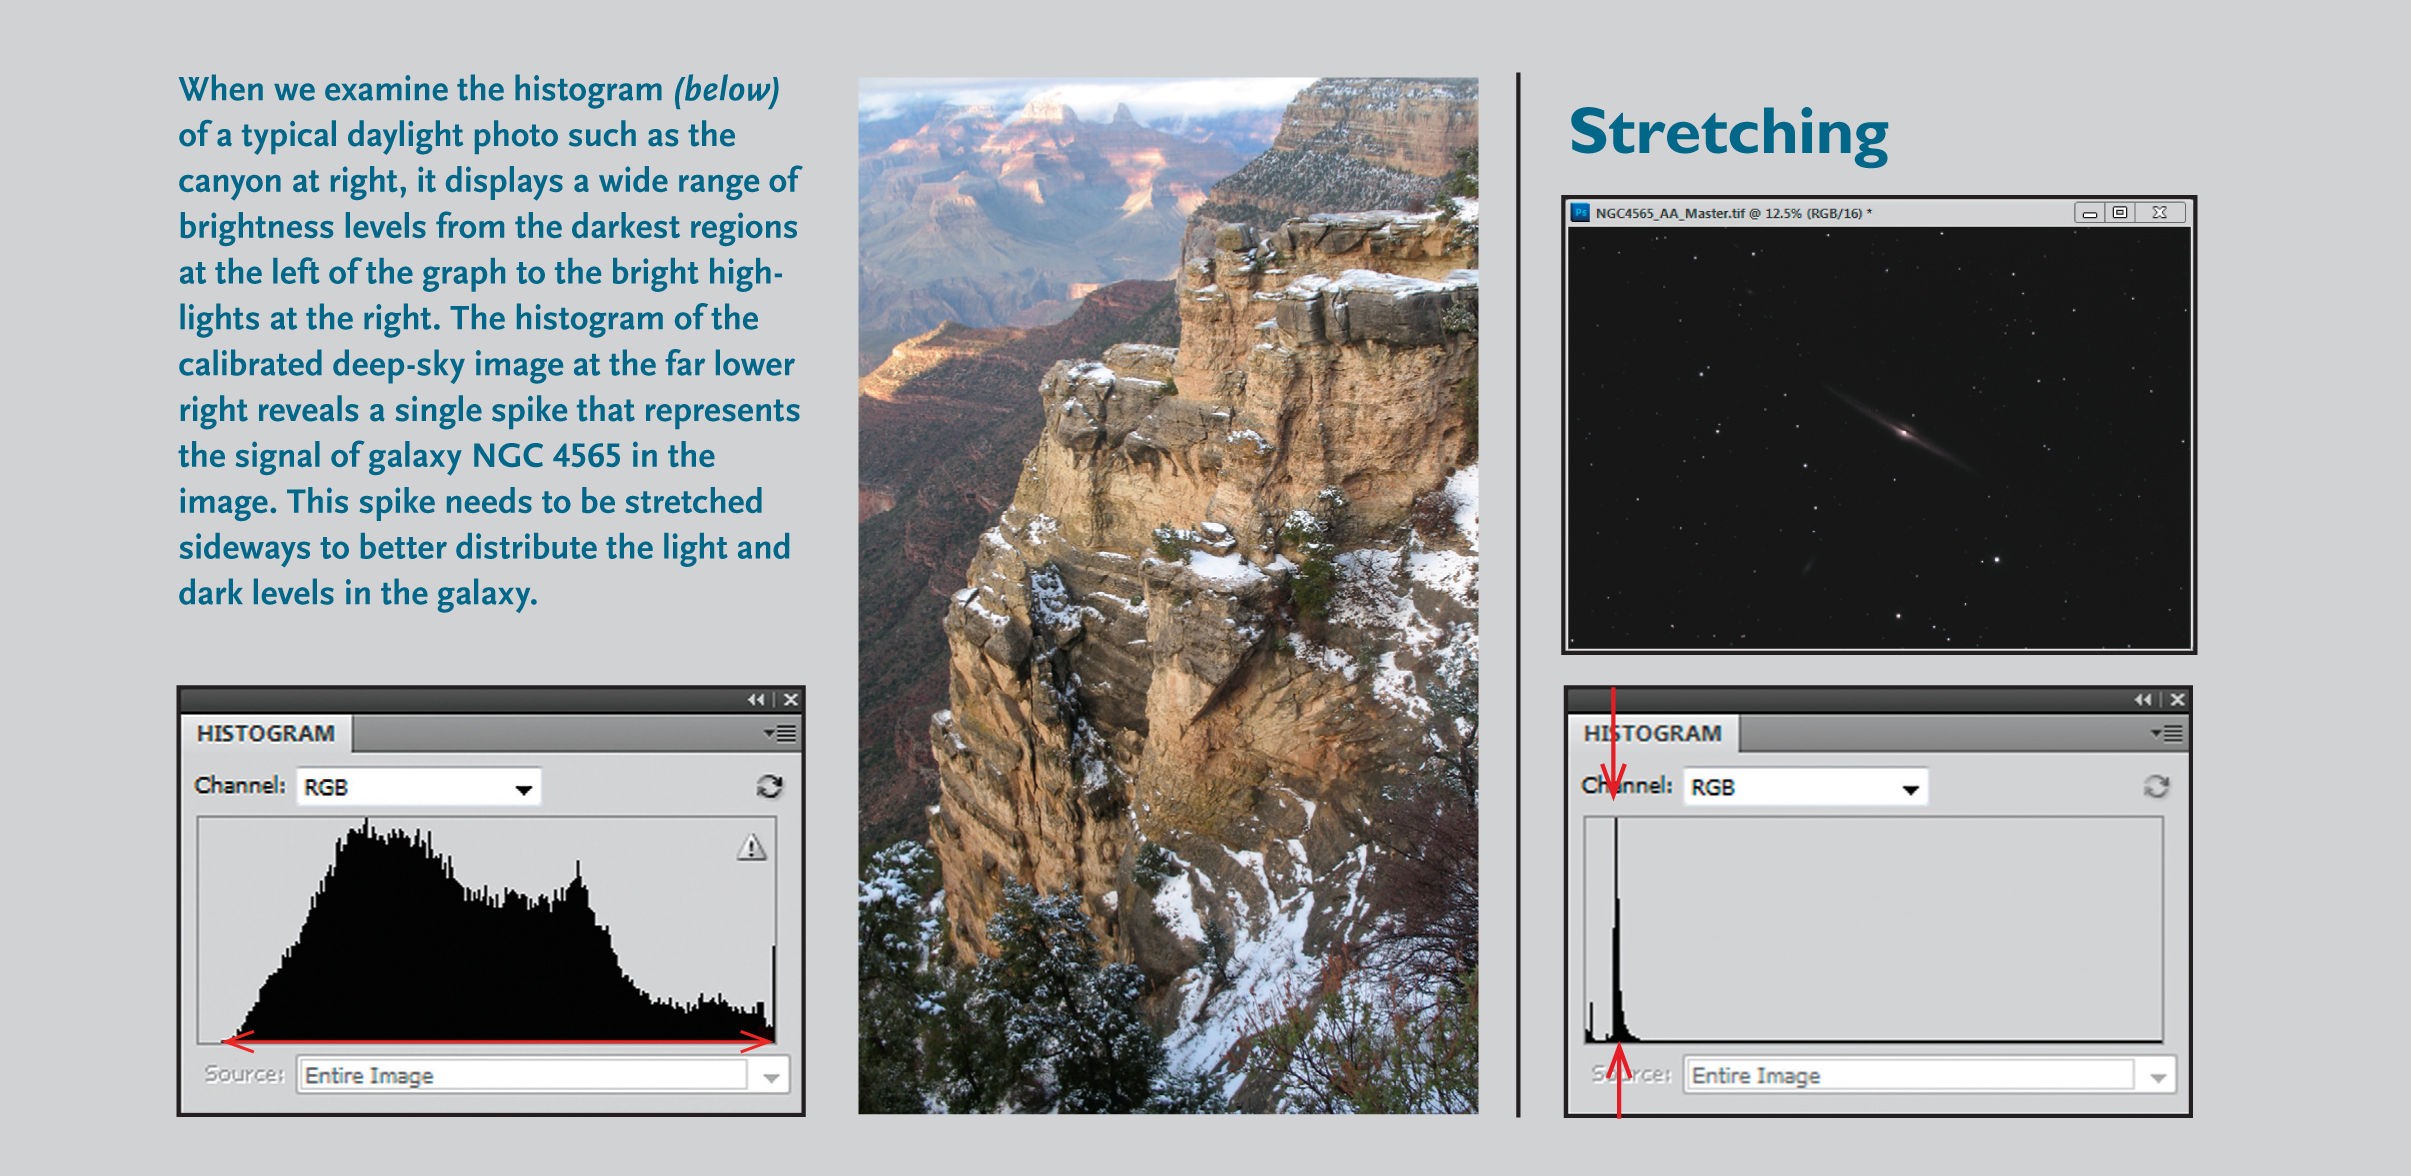
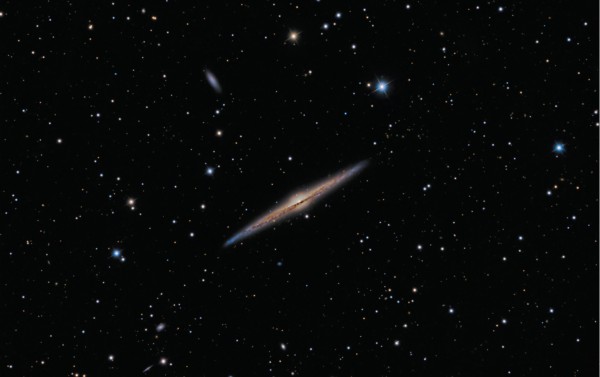
Stacked subframes produce an image that needs to be stretched. Unlike daylight images, the vast majority of celestial objects are so faint that even with hours of exposure, the combined result appears mostly black with a smattering of stars across the field. We need to stretch the image to reveal our target.
So what is stretching? To find out, we first need to examine a graph called a histogram. The histogram displays the range of dark and light levels in an image. Every good image-processing program has some form of histogram display. If we look at the histogram of a typical daylight photograph, the intensity range is spread out, occupying the majority of the graph. But when we examine the histogram of a typical unprocessed deep-sky photo, it generally consists of a flat graph with a single thin spike. That spike holds the bulk of the information in our precious data; everything to the right of that spike is a star. Our task is to redistribute, or stretch, the pixels over the greater part of the graph to better resemble the dynamic range of terrestrial photographs. This is where the art in astrophotography comes into play.
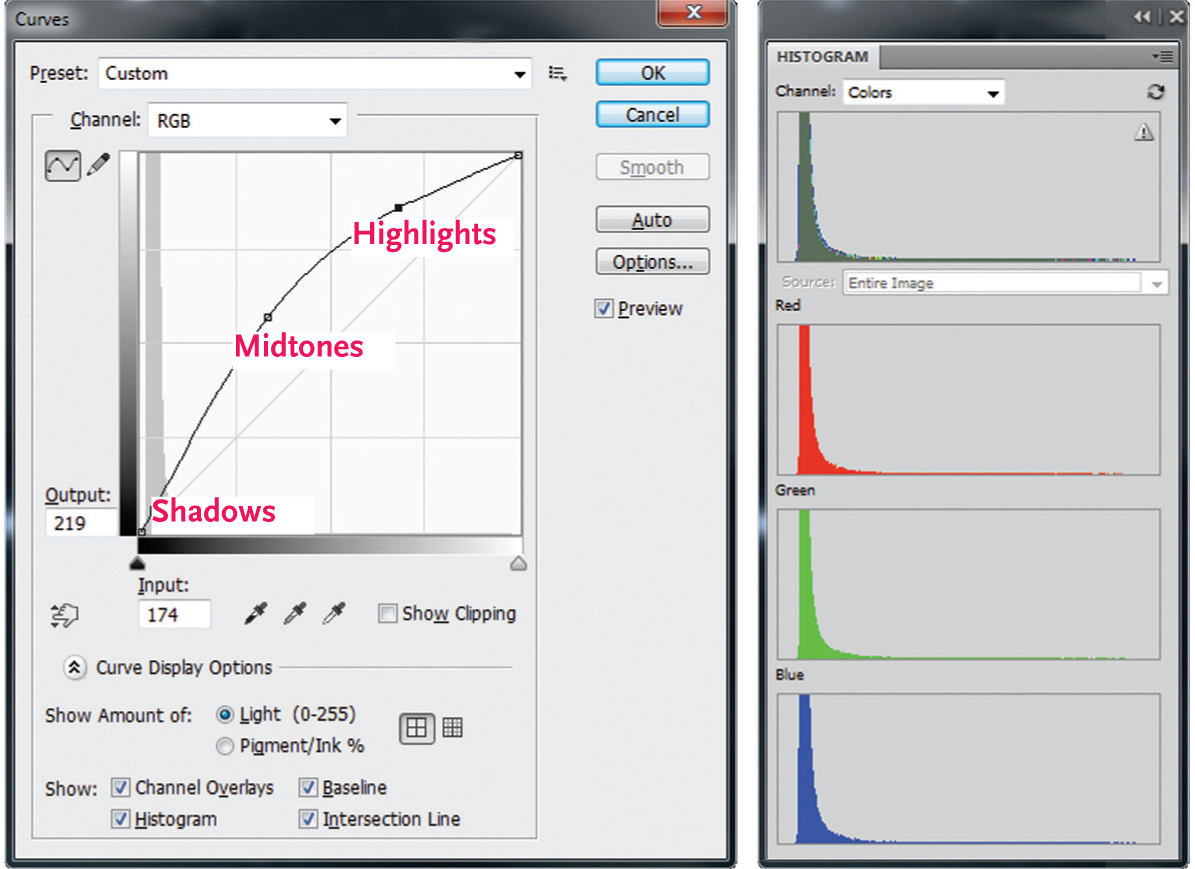
Using stretching tools in our CCD image-processing software such as Digital Development or Curves, we can keep the background sky dark and the stars from becoming too bright while giving a significant boost to the critical midrange where our subjects generally hide. The image on page 72 shows a typical application of the Curves tool in Adobe Photoshop. The left side of the graph represents shadows, the right is highlights, and the midrange lies in between. Judicious applications of Curves preserve all of the detail and color that you originally captured. With the histogram stretched to an appropriate brightness level, you can then sharpen and further enhance an image to increase local contrast.
Stretching usually reveals one final artifact that needs to be dealt with in astrophotos: gradients. Gradients are often the result of light pollution, and appear as a linear brightening across an image. Most image-processing programs include tools for reducing gradients.
Warren Keller
Saturate
Finally, it is rich color that makes the human brain think “Wow!” In astrophotography, we can use artistic license by boosting color saturation to an aesthetically stimulating level. Unfortunately, it’s not as easy as dragging a slider to “More.” Advanced imagers devote a great deal of time to achieving good color balance. When you assemble red, green, and blue images into a chrominance photo, be careful to stretch them equally and to monitor the way these three channels relate to one another. Linear adjustments such as Photoshop’s Levels and Color Balance tools work well for subtle adjustments, and astronomy-specific programs such as PixInsight’s "Color Calibration" tool is nothing short of brilliant.
In truth, we have only begun to learn our ABCs. There is so much more to producing jaw-dropping images of the heavens, but beginning with these basic “S’s” will give you a head start to mastering the CCD alphabet.
Warren Keller
Are you dreaming of getting started in astrophotography? Learn from the experts in our FREE astrophotography ebook, which gives you the tips you need for nightscape, planetary, and deep-sky astrophotography.
 Warren Keller is author of the video tutorial series Image Processing for Astrophotography, available at www.ip4ap.com.


Comments
Pickers84
July 8, 2018 at 9:11 am
Far out! a lot goes into Astrophotography! This is a very in depth tell of it and I appreciate the work you have done. I am looking into it and there is a lot to learn. I will be getting a SKY-WATCHER 8" GOTO COLLAPSIBLE DOBSONIAN TELESCOPE to see some deep space objects as I currently own a 3" and although it lets me see the moon clearly it is quite restricted.
You must be logged in to post a comment.
You must be logged in to post a comment.