 0
0
Dennis di Cicco
As is usually the case for S&T Test Reports involving imaging products, there were more photographs made with Tele Vue’s new 3-inch Big Paracorr coma corrector than would fit in the review that appears in the April 2015 issue. Furthermore, pictures appearing with a review are often selected to emphasize aspects of the product rather than be aesthetically pleasing. Thus we’re presenting here some of the images that remained on the cutting-room floor when the review was prepared for publication.
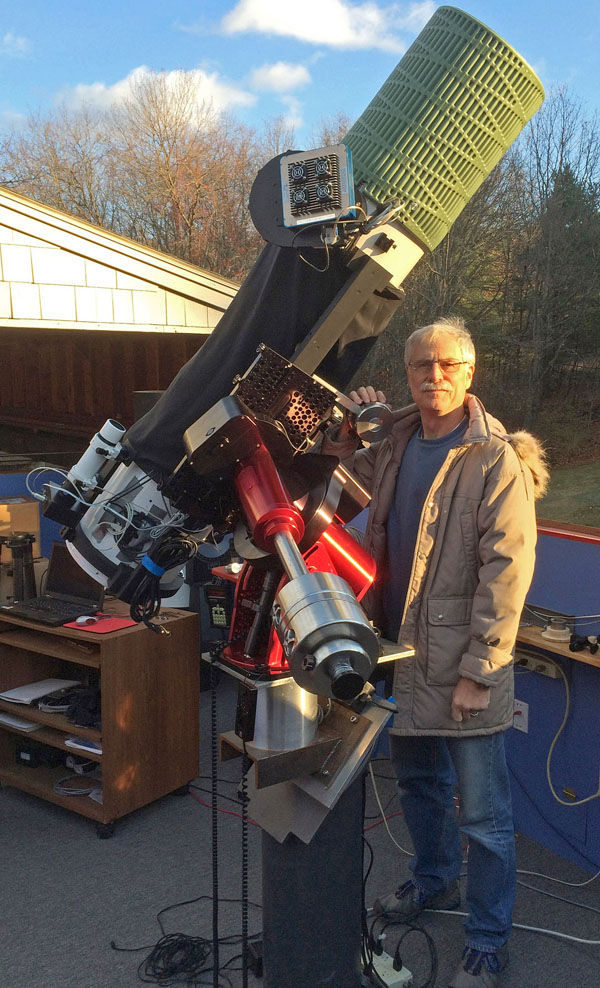
All the images were made with the Meade 12-inch f/5 LightBridge Dobsonian reflector described in the review and pictured here with me. As explained in the review, the scope was modified to accept the Paracorr, which requires a 3-inch focuser.
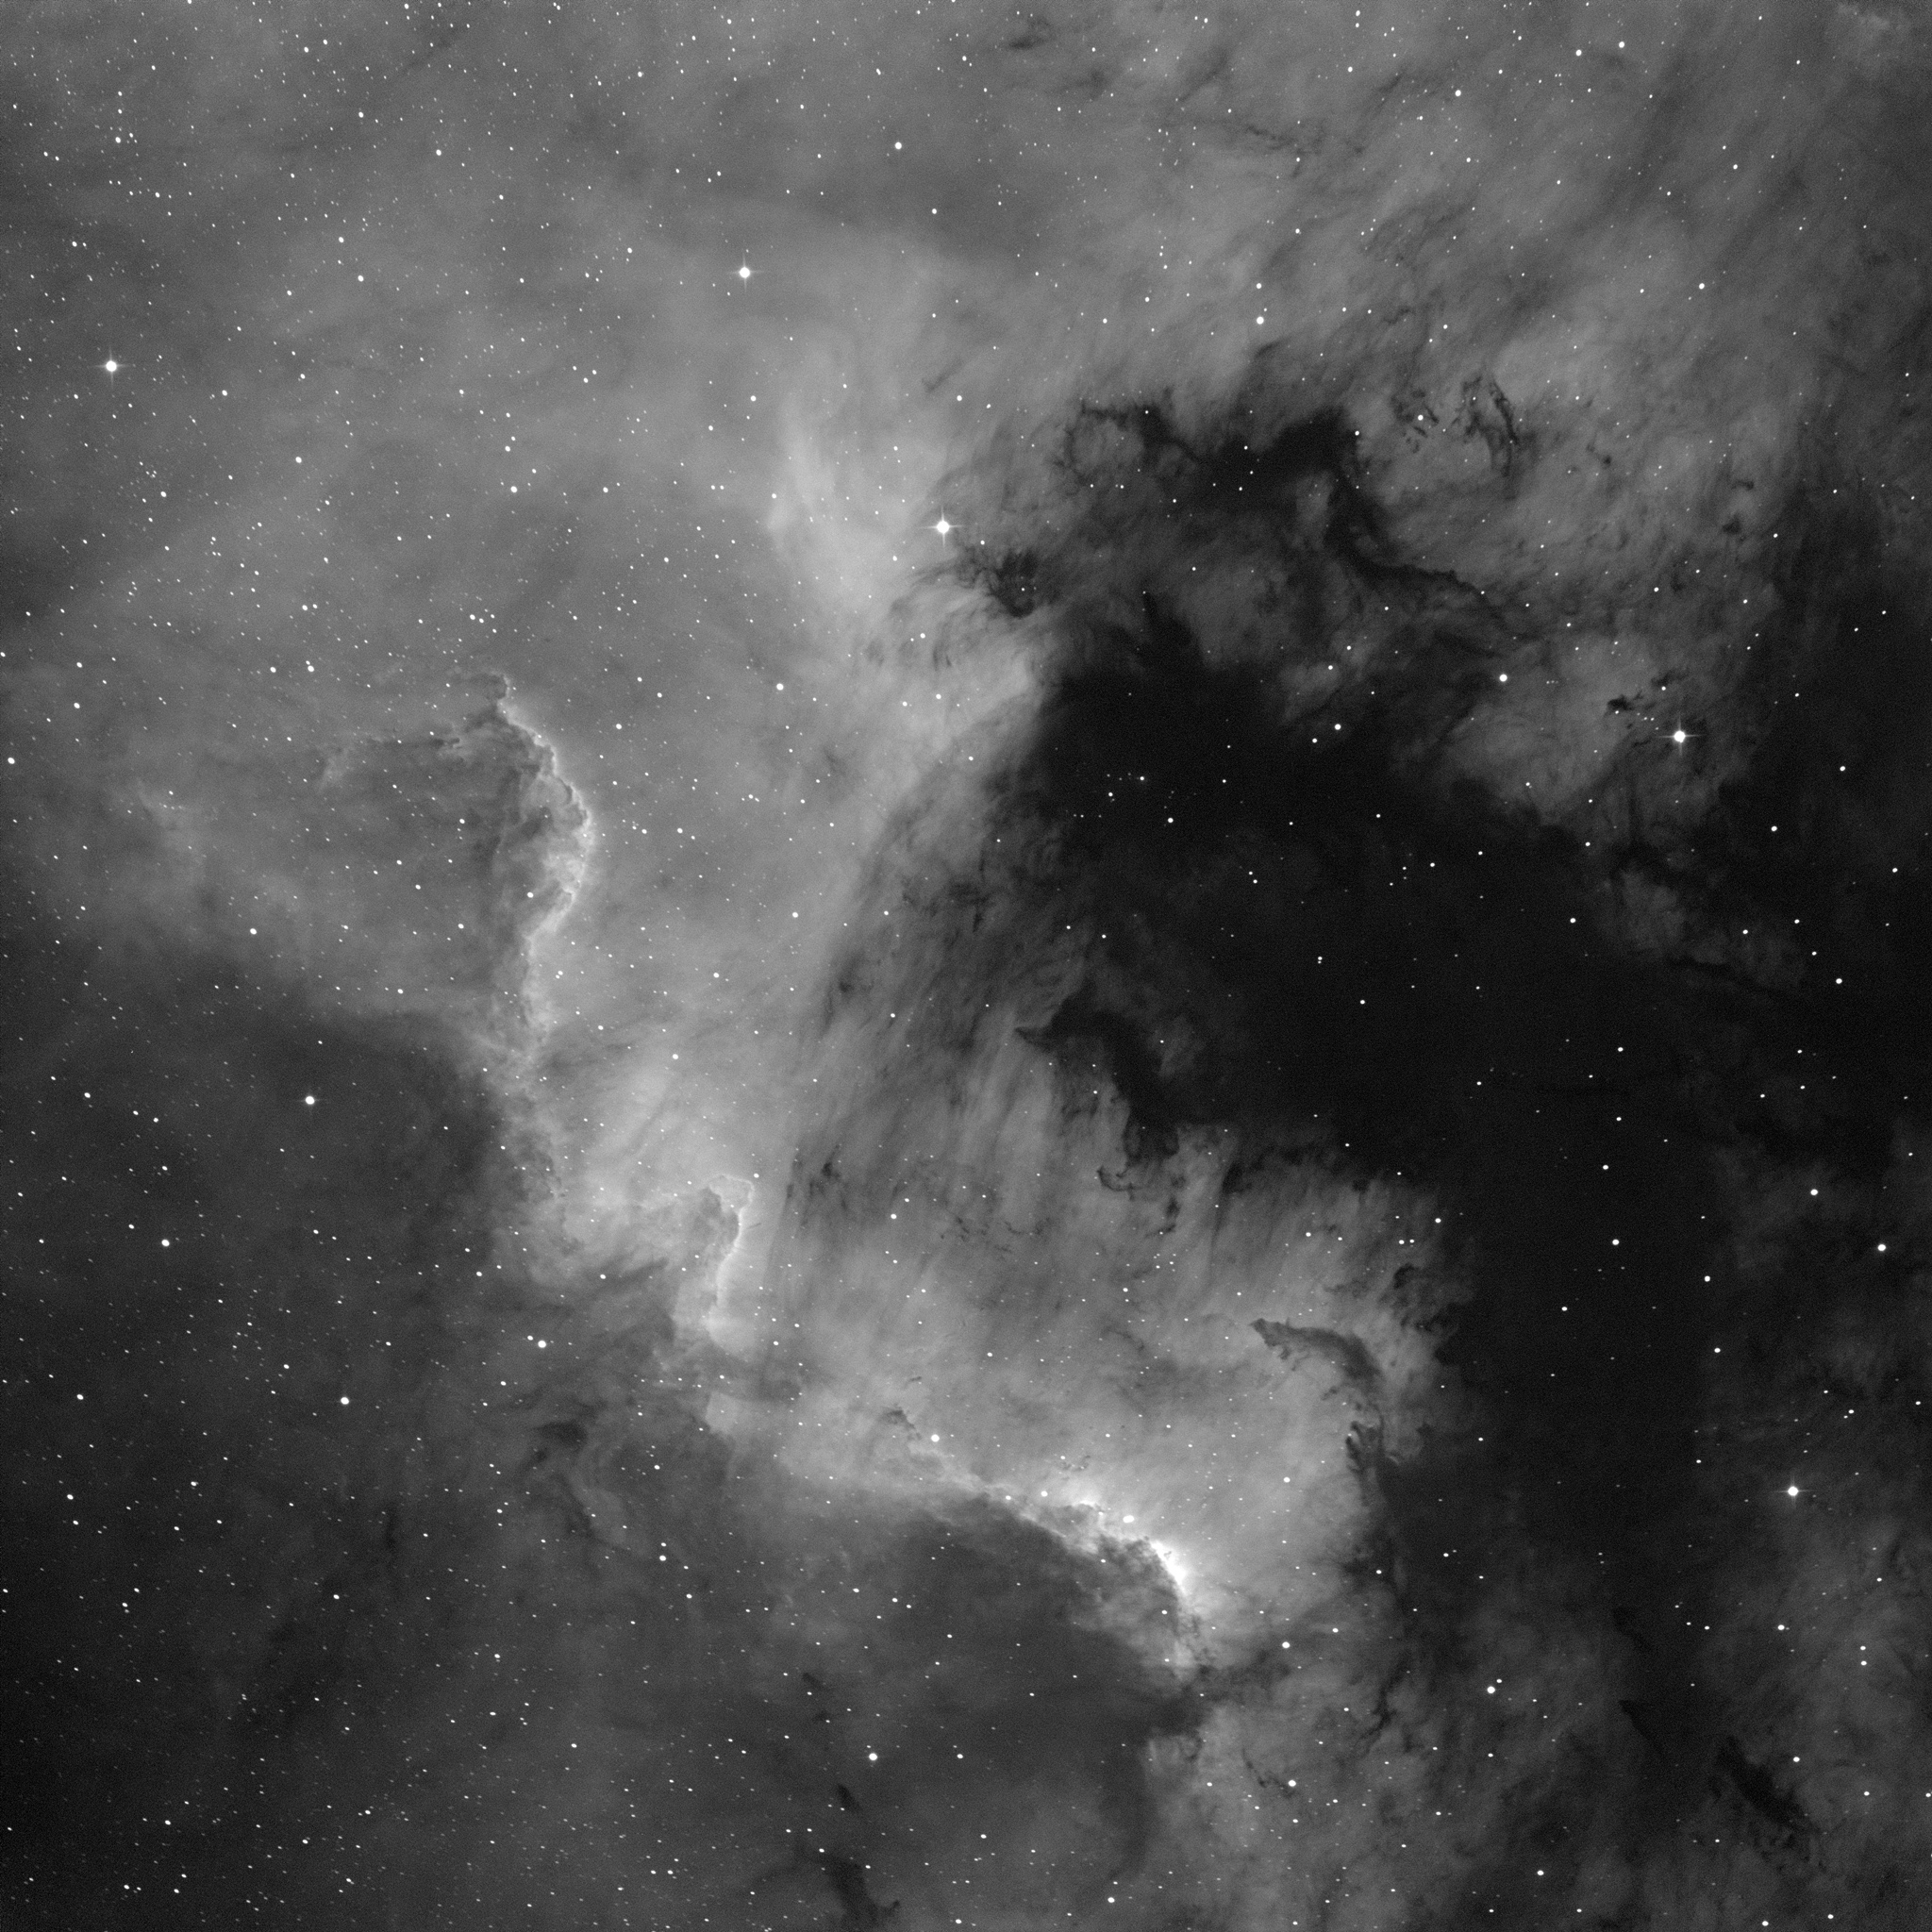
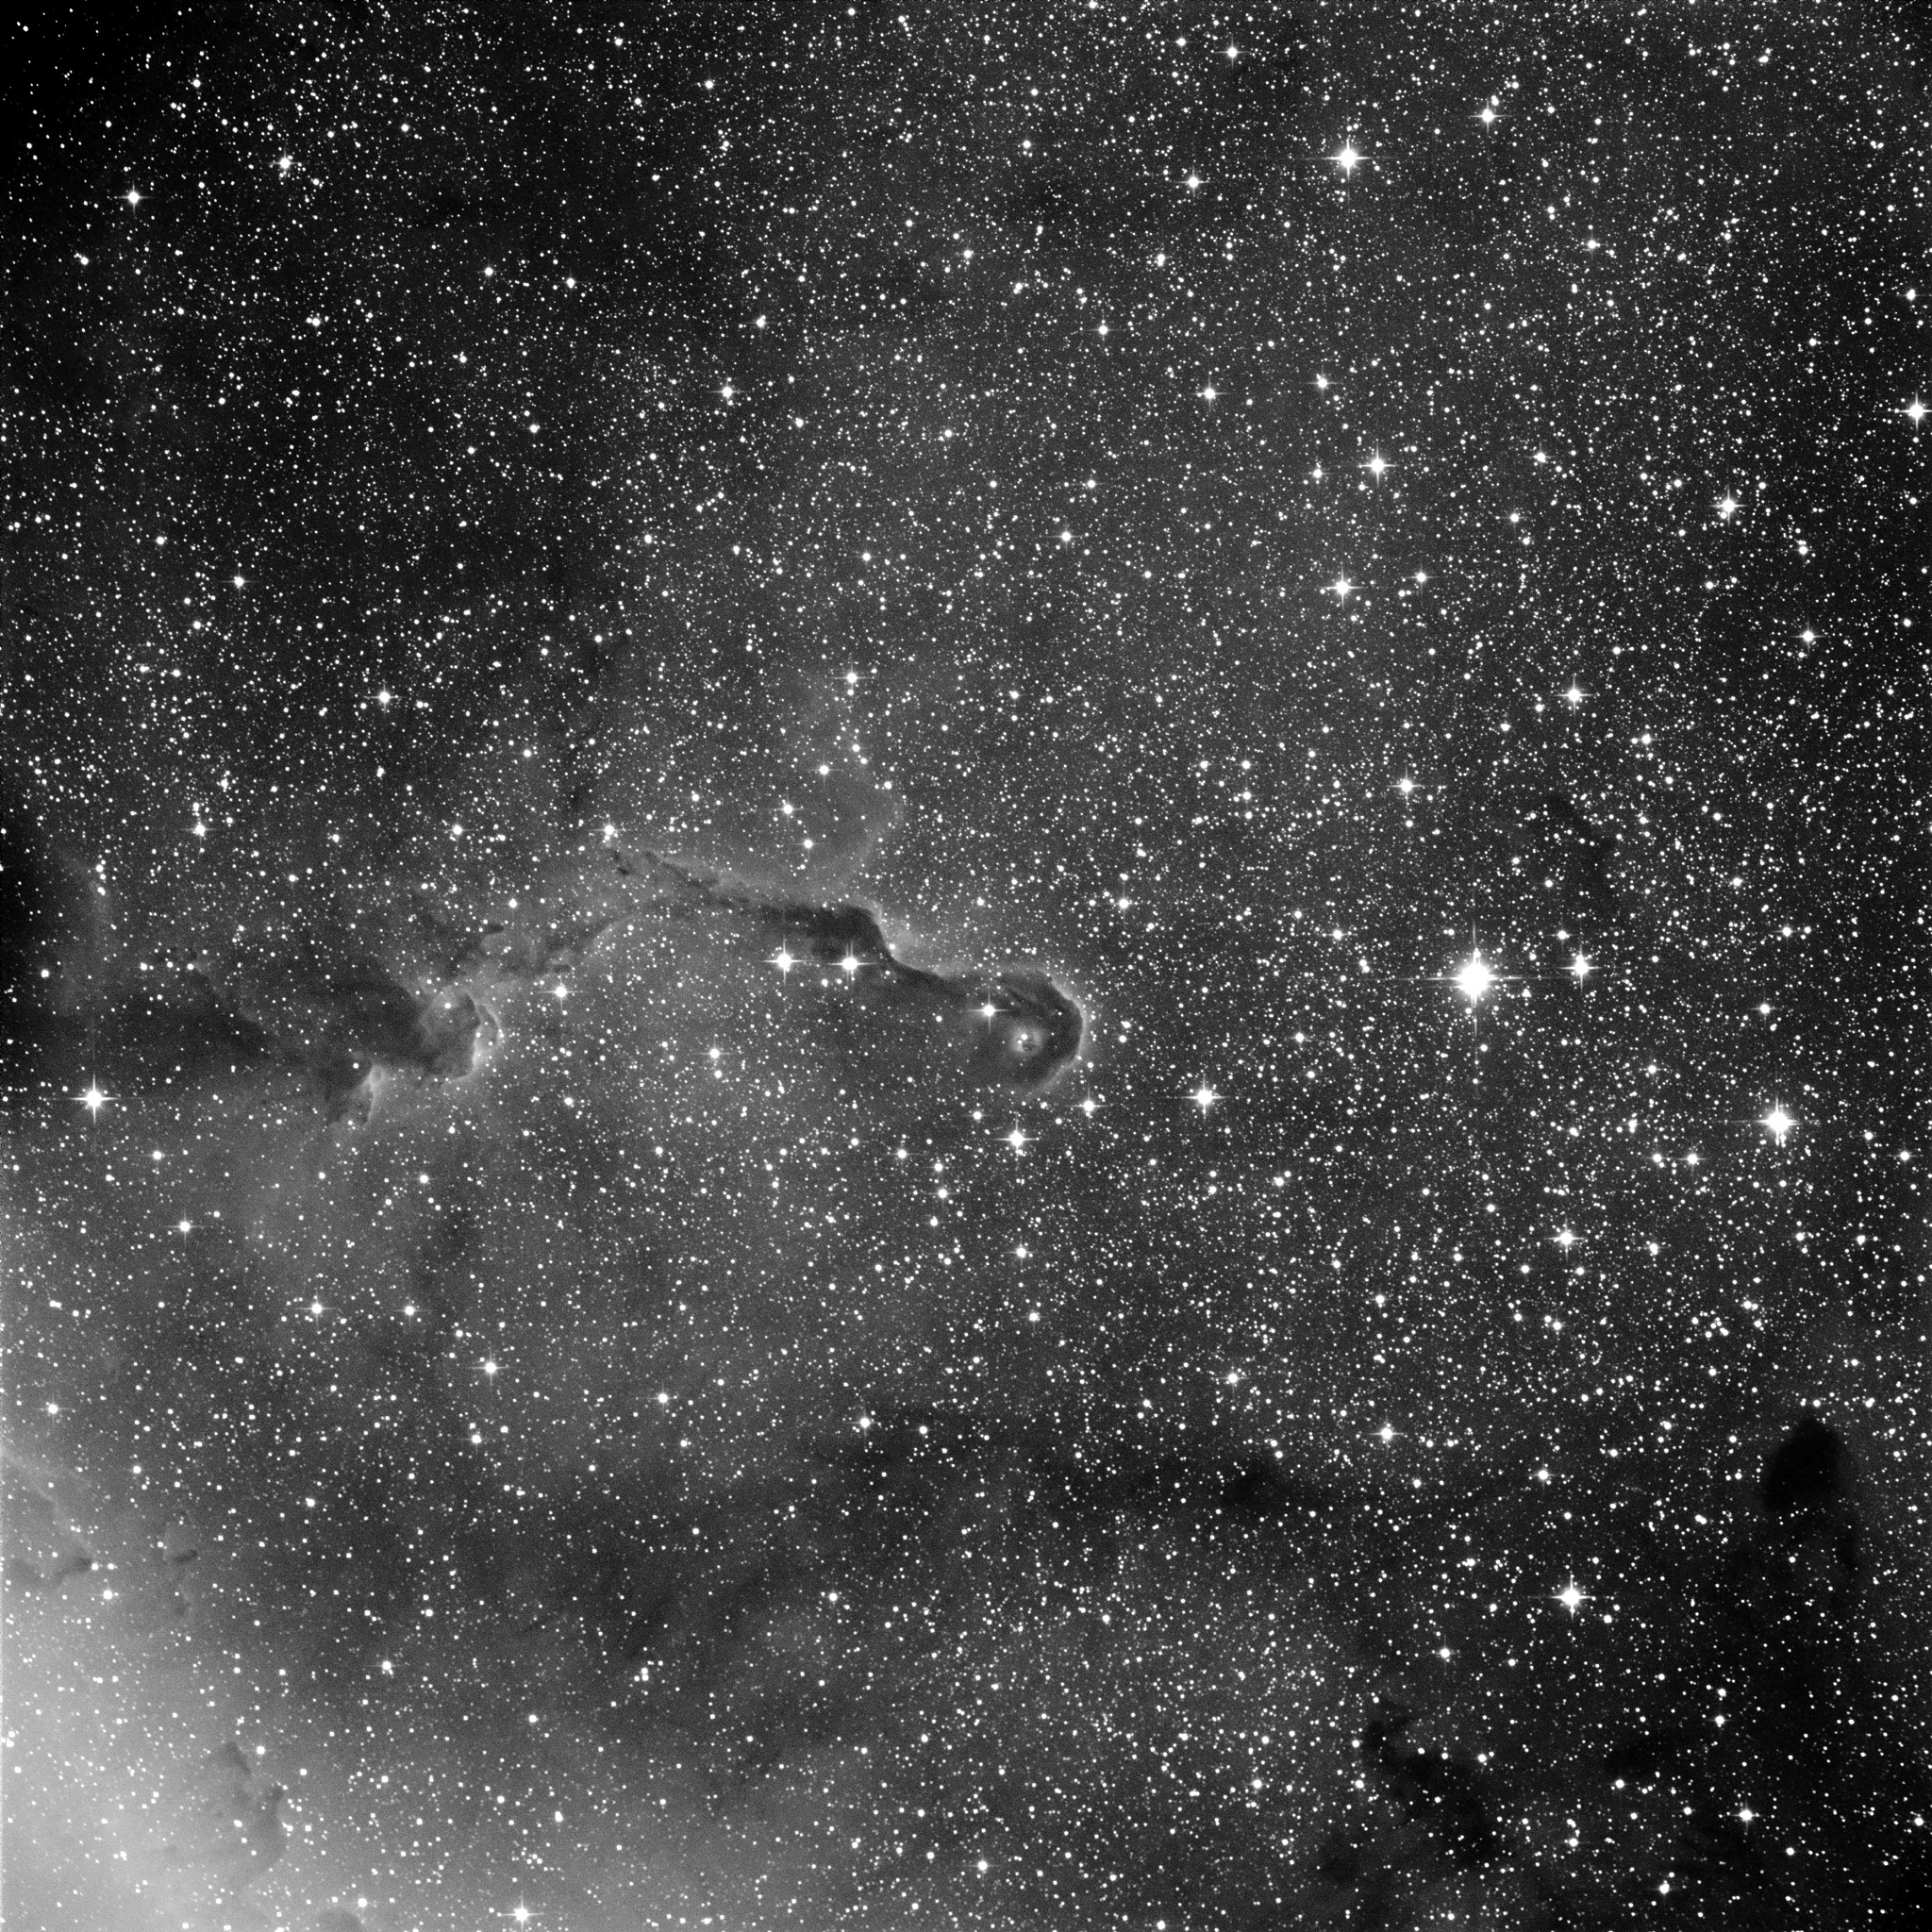
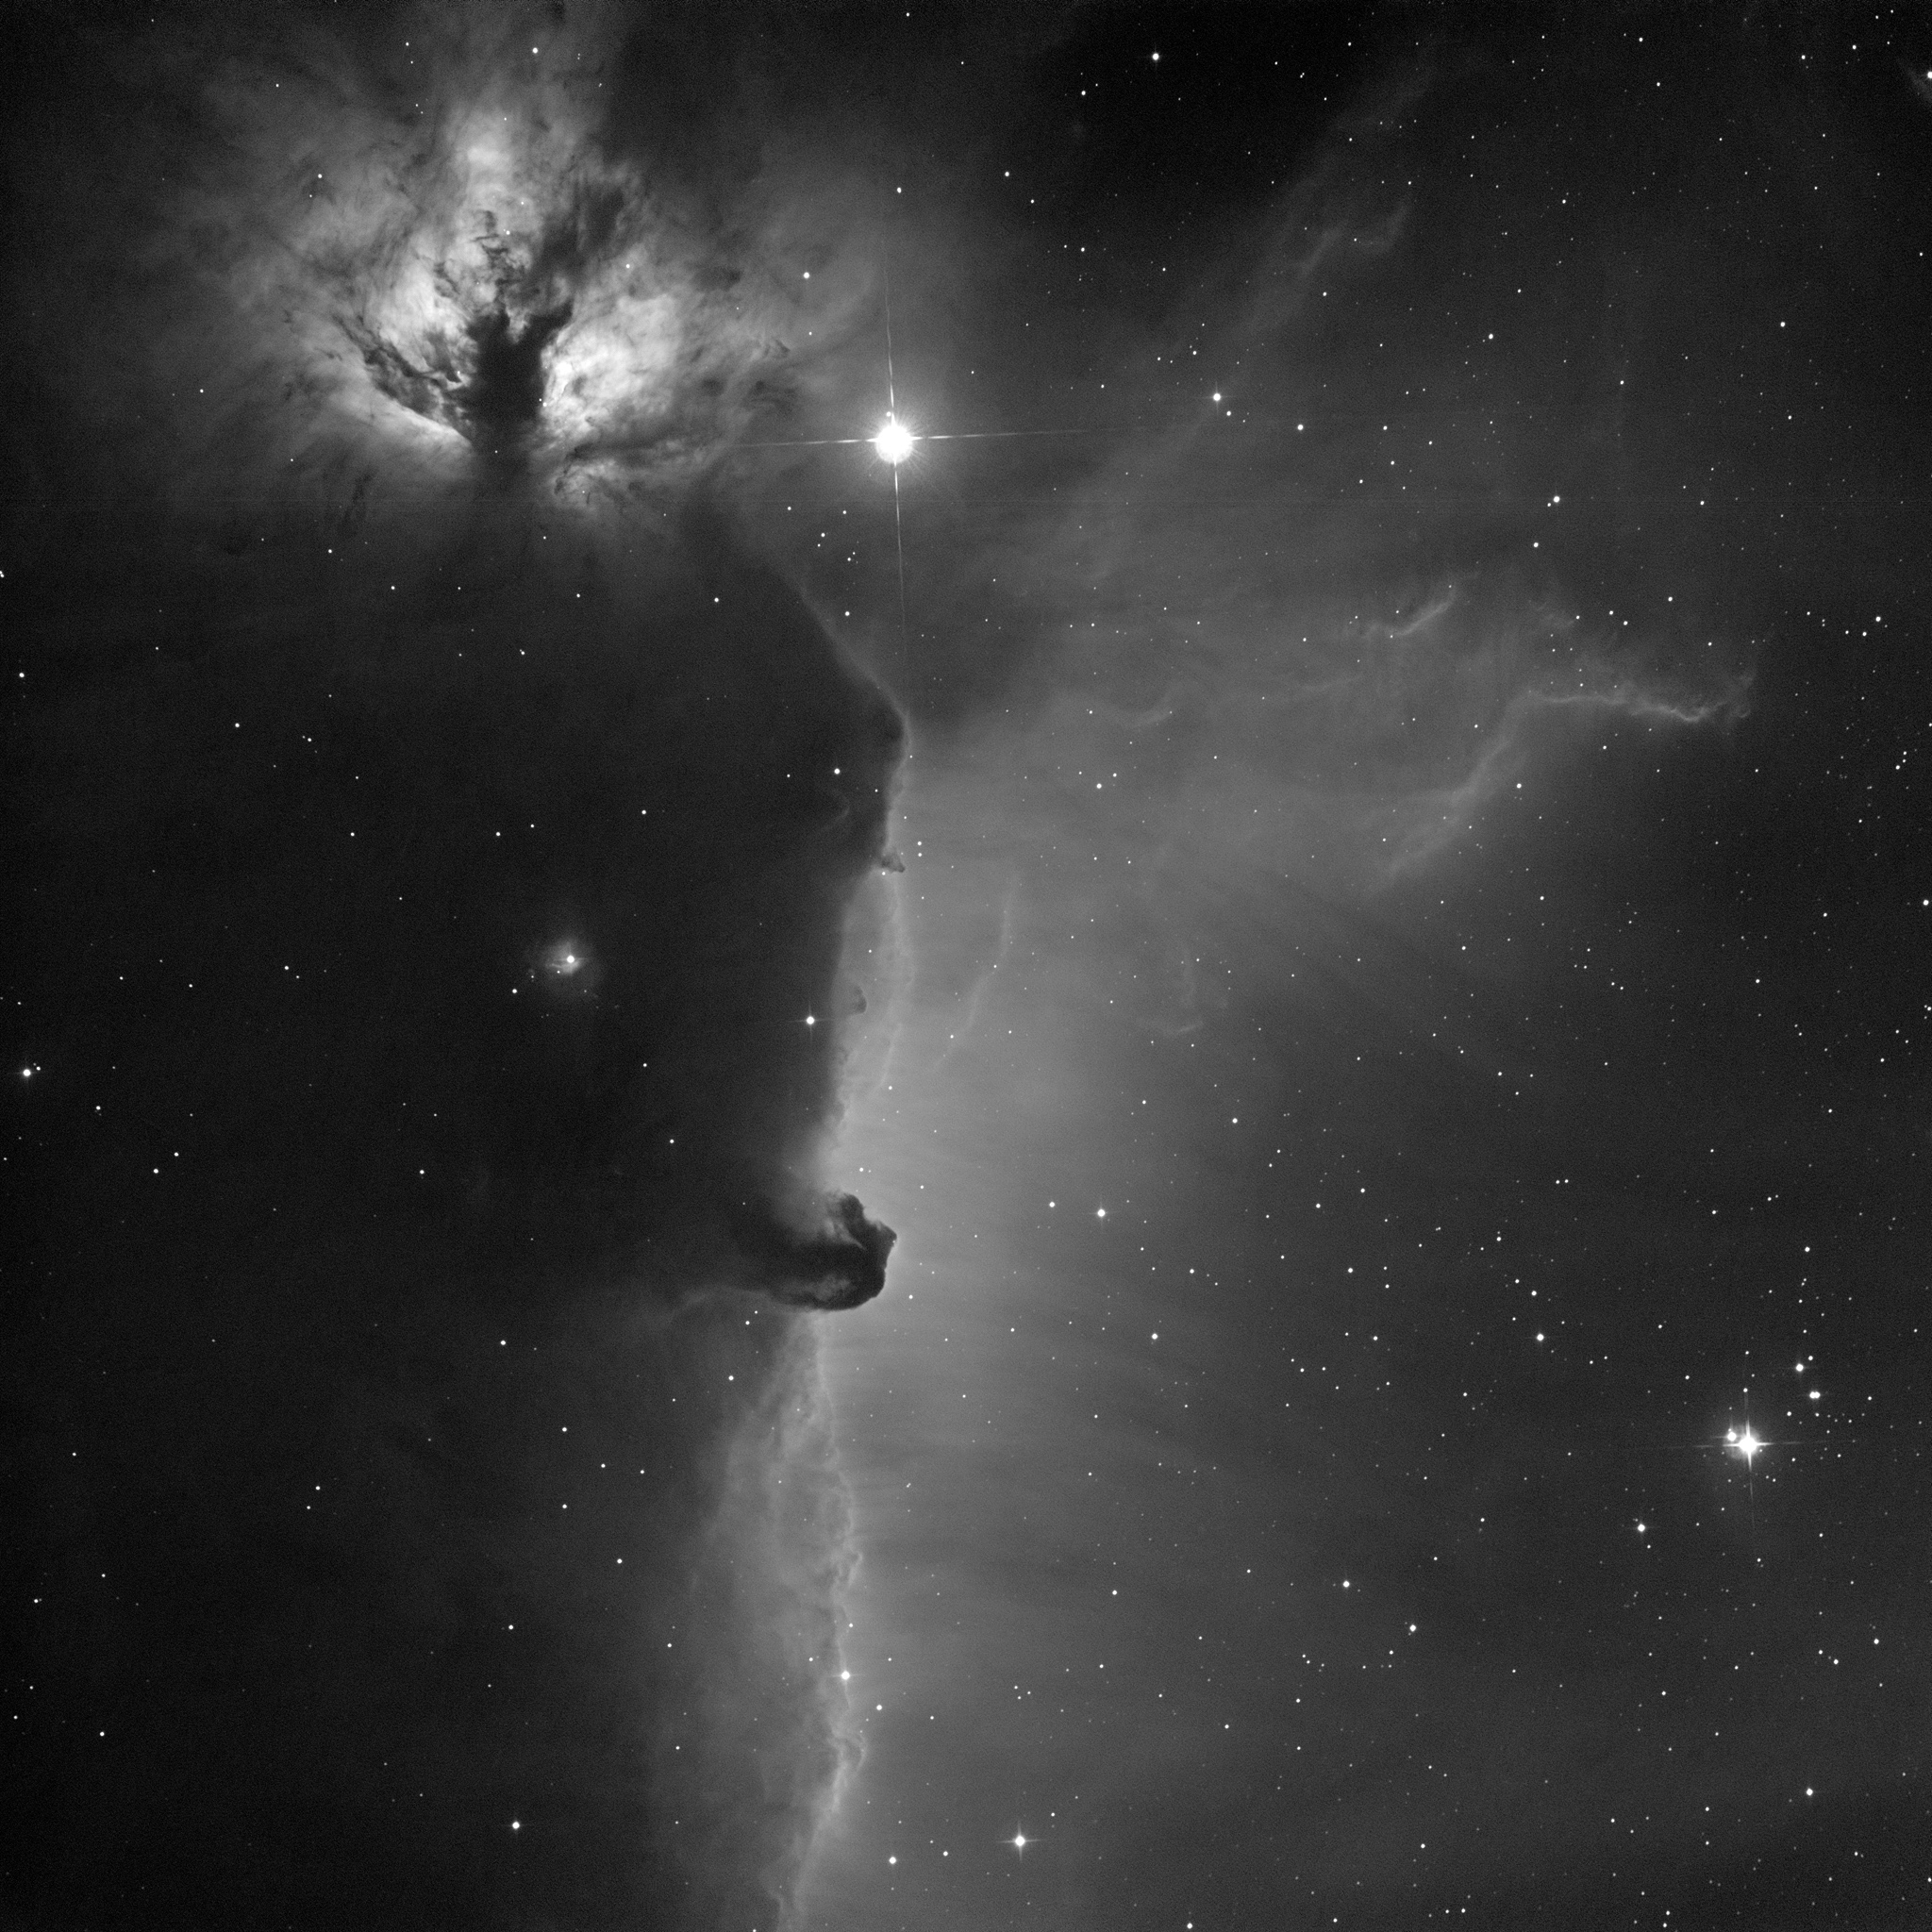
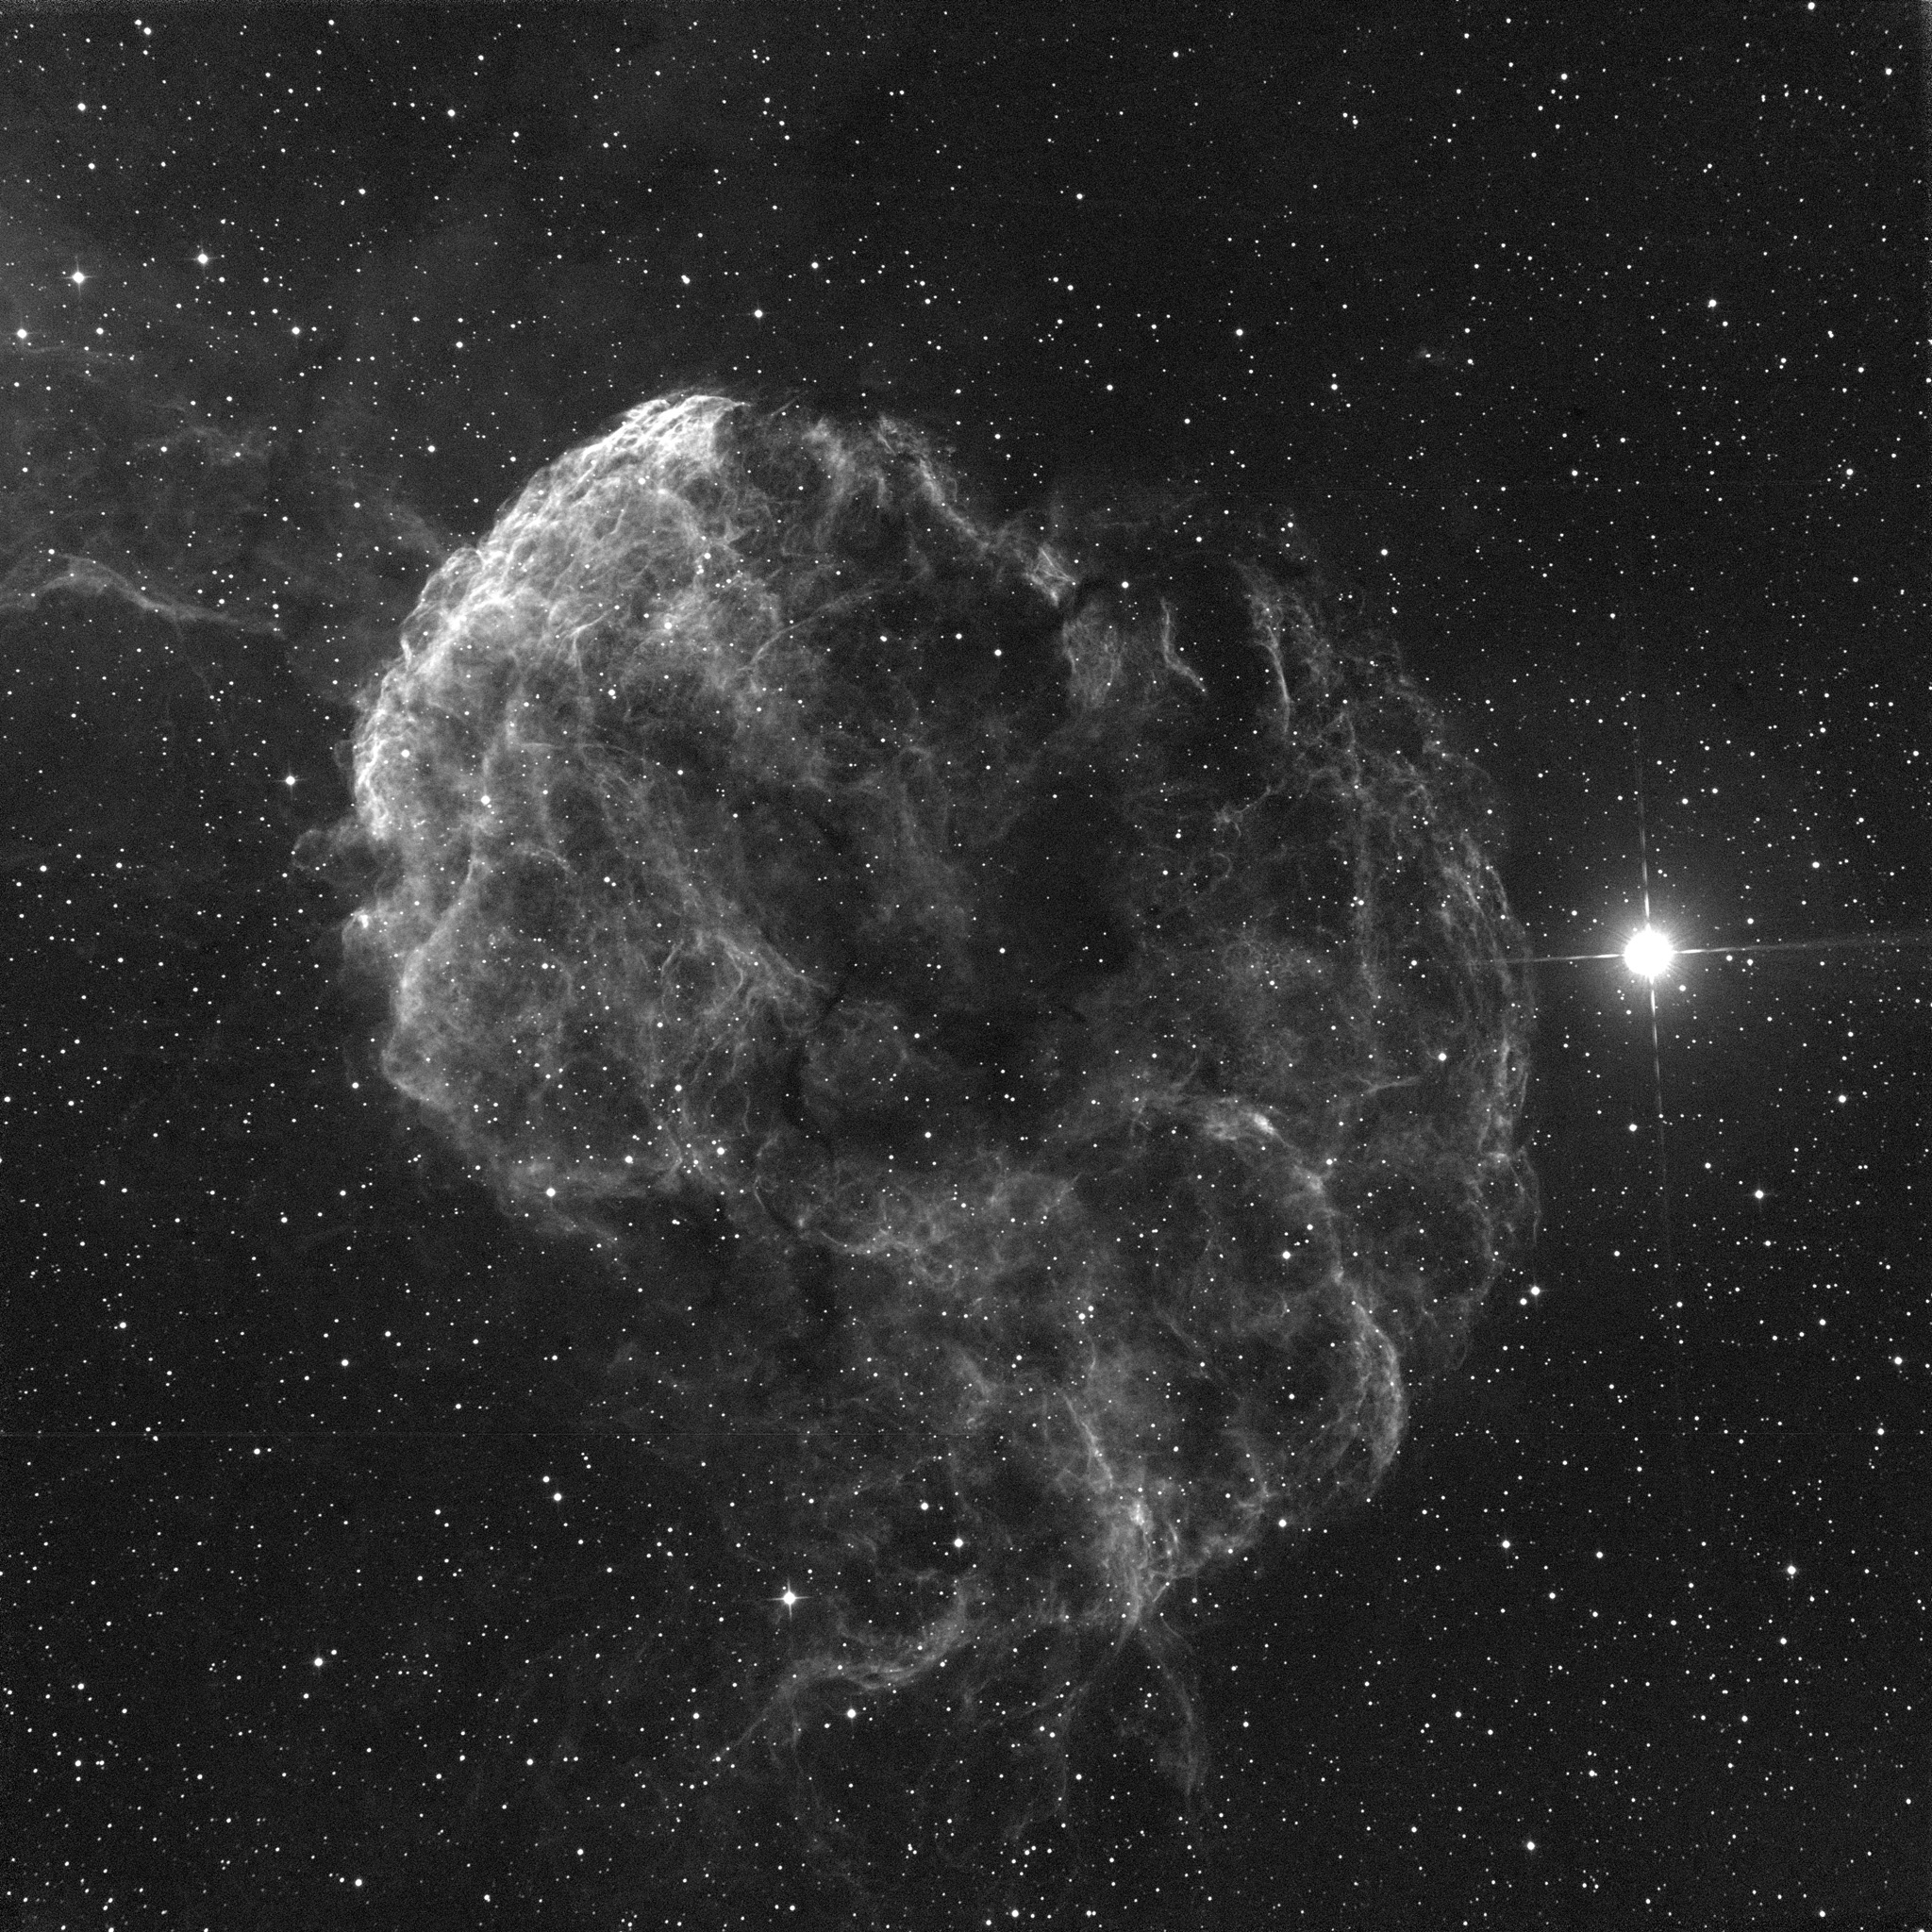
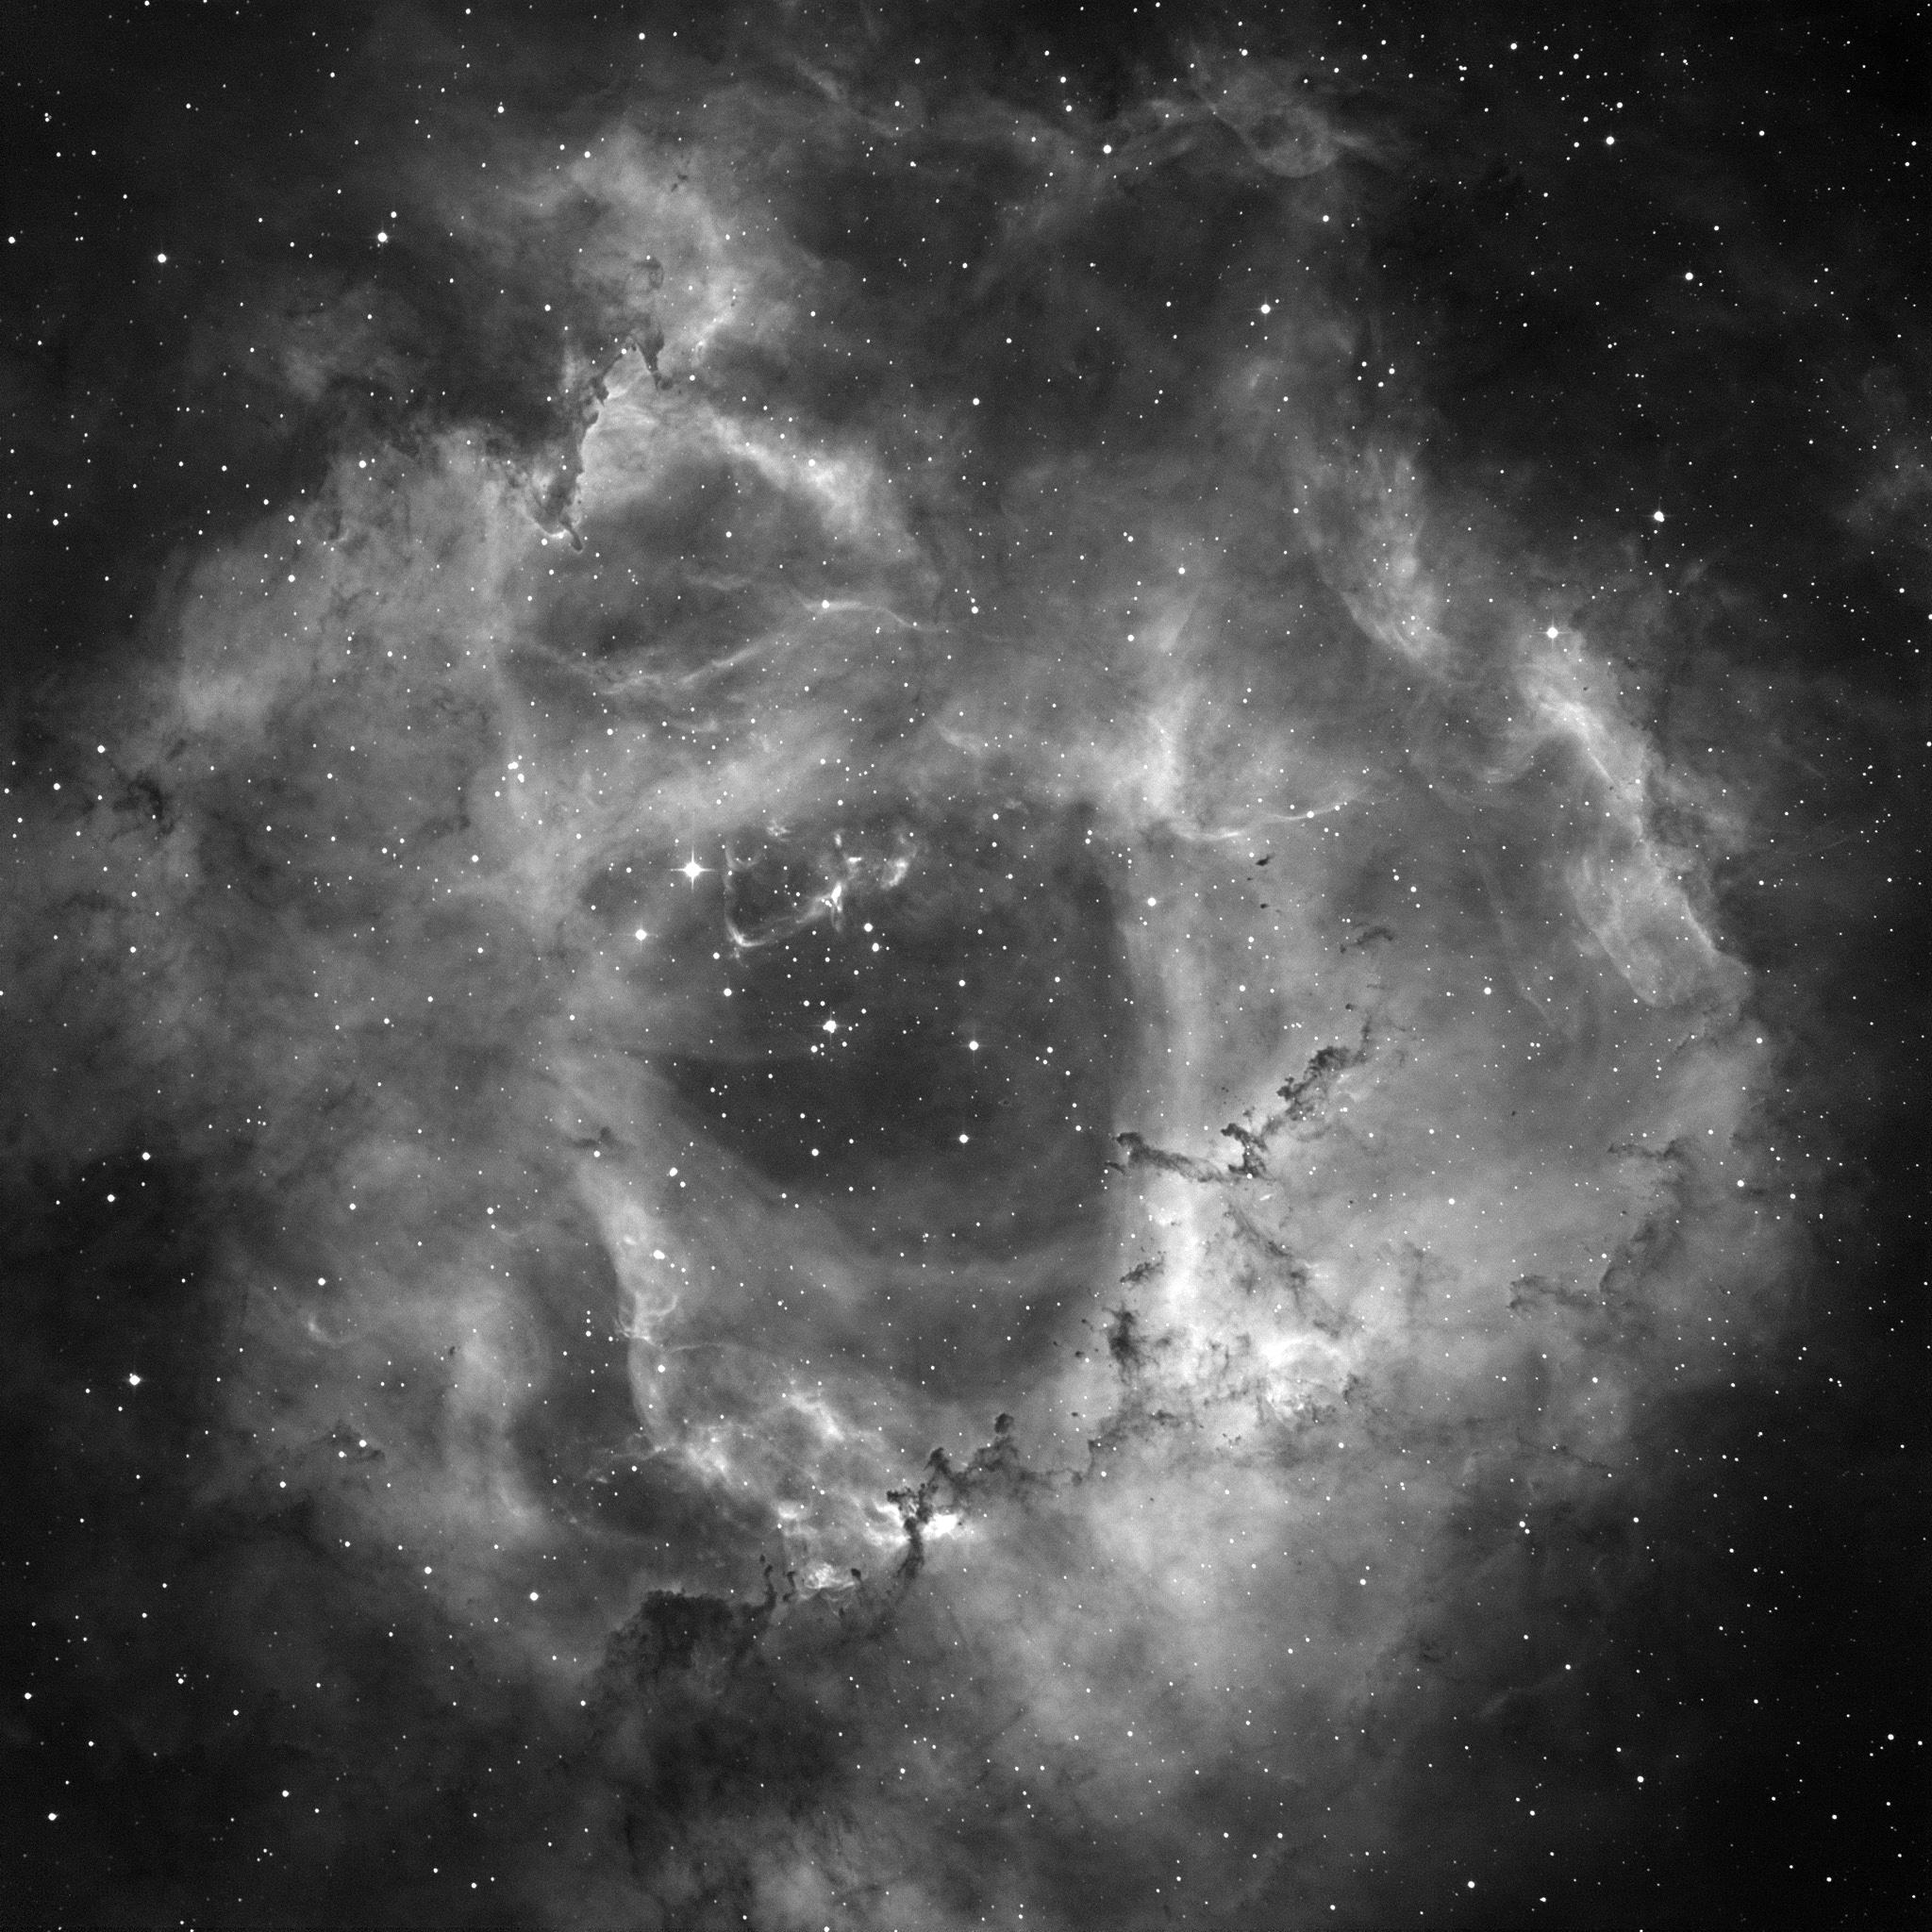
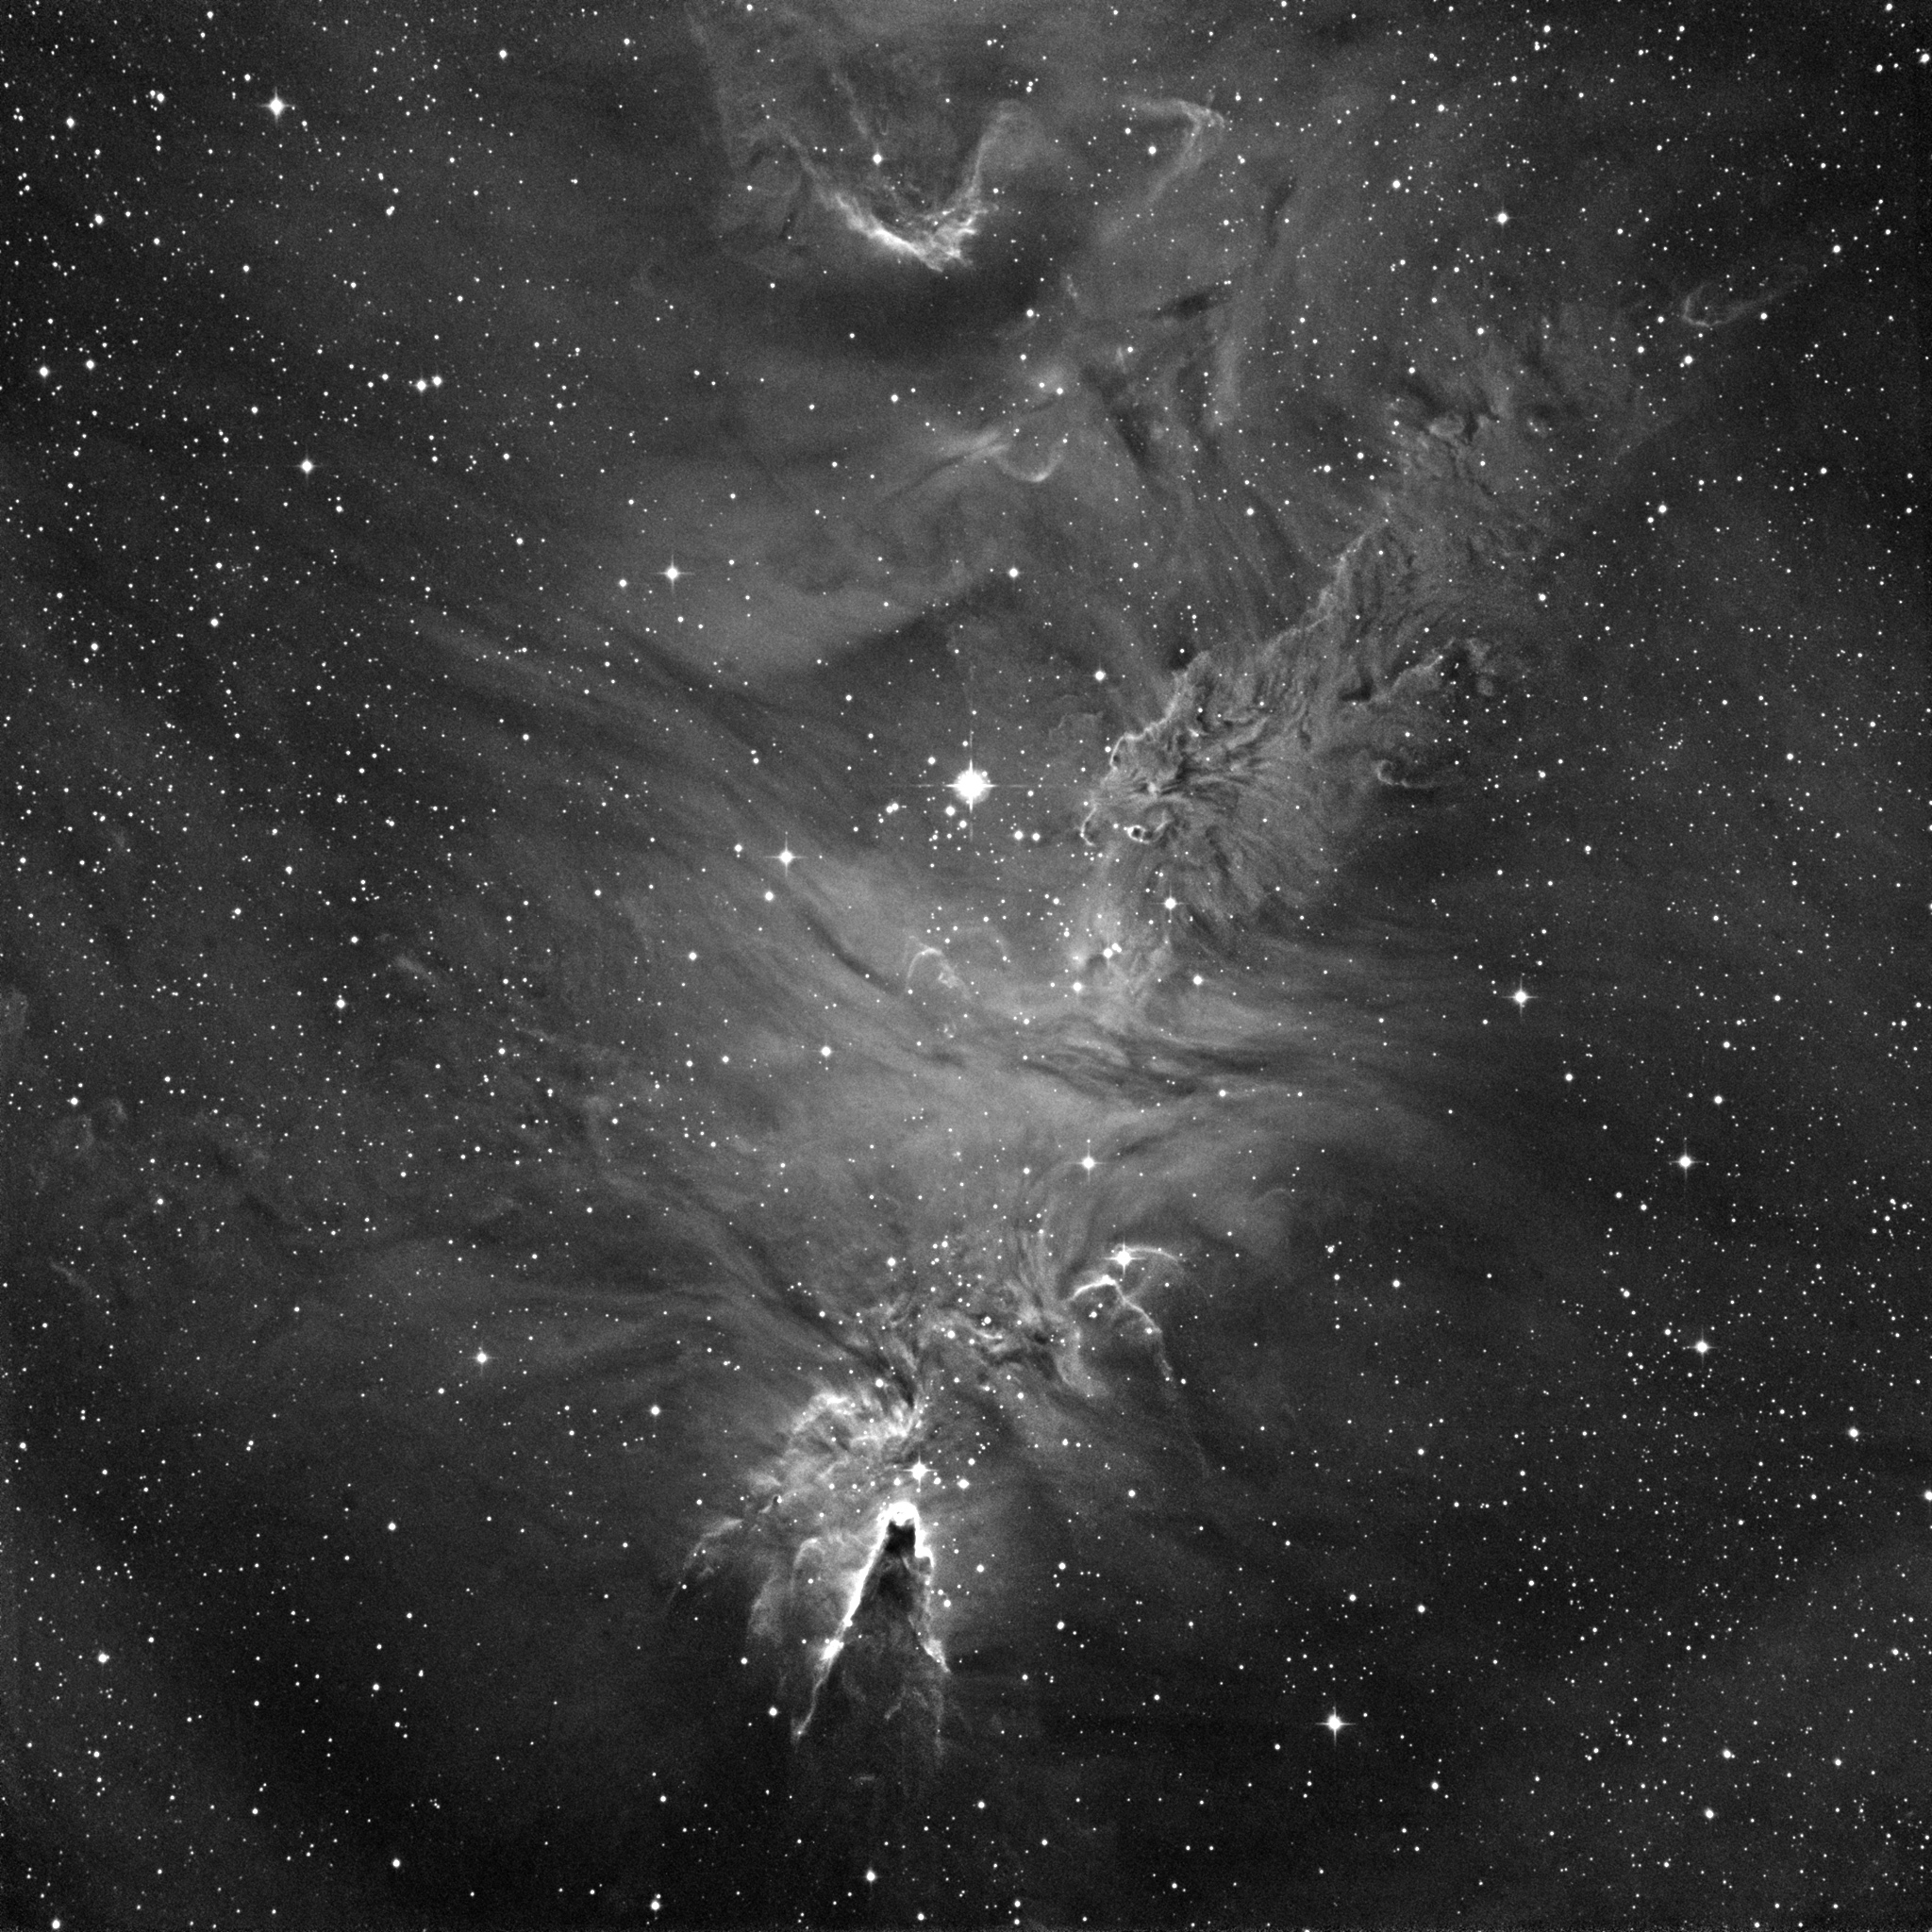
The images were made with an Apogee U16M CCD camera equipped with a KAF-16803 sensor, and, except where noted, all were made through a 3-nm Astrodon hydrogen-alpha filter. They were assembled from 10-minute subexposures that were calibrated with dark and flat-field frames and stacked with MaxIm DL software. The images are reproduced full frame, and with only minimal processing to enhance image contrast. No special sharpening or star-enhancement algorithms were used during the processing.
My love of black-and-white deep-sky photographs, especially long-exposure images made through hydrogen-alpha filters, goes back to my earliest days as an astrophotographer shooting Kodak’s “astronomical” emulsions 103a-E, 103a-F, and, later, hypersensitized Tech Pan 2415.
And it’s been my good fortune that this work can be done from the light-polluted backyard of my suburban home less than 20 miles from the heart of downtown Boston. Digital cameras and image processing raised the level of my results far beyond even my wildest expectations in the days of film.
Initially I planned to modify my 12-inch LightBridge only as a temporary test bed for the Paracorr. I didn’t seriously consider the modified scope as a permanent astrograph. Nevertheless, as I mentioned in the review, that wouldn’t have been such a crazy idea.

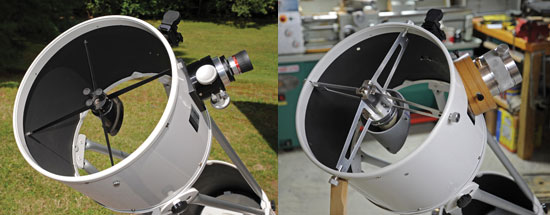
I was initially worried that the front end of the LightBridge wasn’t rigid enough to handle the weight of my heavy CCD camera, filter wheel, the Paracorr, and my homemade focuser, not to mention the 4-inch secondary mirror and heavy spider assembly. I was especially concerned about all the added weight flexing the thin-wall steel used for the scope’s upper tube assembly.
As it turns out, there was some flexure, but it probably could be fixed with minimal reinforcing. The LightBridge’s well-designed truss structure is more than strong enough to handle the extra load. Had I made the LightBridge modifications with a bit more care, and made provision for squaring the focuser/camera to the scope’s optical axis, the setup would be an excellent permanent astrograph.
If it weren’t for my current project of resurrecting the 12-inch f/4 scope that I started building some years ago (it’s mentioned in the review), I would certainly consider re-working the LightBridge for permanent astrophotography with the Big Paracorr and large-format CCD cameras.
The Results
Click on the images below for larger views.

Comments
You must be logged in to post a comment.