 0
0Learn how to look at the Sun safely, whether it’s during a solar eclipse or on an ordinary sunny day.
Viewing the Sun's brilliant face can be very rewarding, whether it's to see a sunspot grouping, to trace out a prominence high above the limb, or — best of all — to watch the Moon's silhouette march across the brilliant disk during a solar eclipse. Learning how to look at the Sun safely allows you all the benefits of sungazing without any of the inherent risks.
How to Look At The Sun Safely

Charlie Bates, courtesy Mark Margolis / Rainbow Symphony
While it's easy to learn how to look at the sun as there are several right ways, there are also many wrong ways to view the Sun. Sunglasses, for example, don't offer enough protection. The danger is obvious: The Sun's disk is so bright that prolonged, direct exposure can cause permanent damage to the retina, leading to loss of vision or blindness. To view the Sun or to safely watch a solar eclipse at any time other than totality, you need to filter out more than 99% of the Sun’s light before it reaches your eyes.
Given these caveats, here’s some practical advice on how to look at the sun to safely observe sunspots and solar eclipses alike. This article covers a wide range of options:
- How to View a Solar Eclipse Directly
- Projecting an Image of the Sun
- Using a Telescope or Binoculars to Look at the Sun
- High-End Solar Filters for Telescopes
How to Directly, and Safely, View a Solar Eclipse
There are numerous ways you can observe the beauty of the Sun with complete confidence that nothing bad will happen to your eyes. If you’re observing the Sun without any optical aid, all you really need are low-cost solar observing glasses. Such eclipse glasses are available from companies such as Rainbow Symphony.
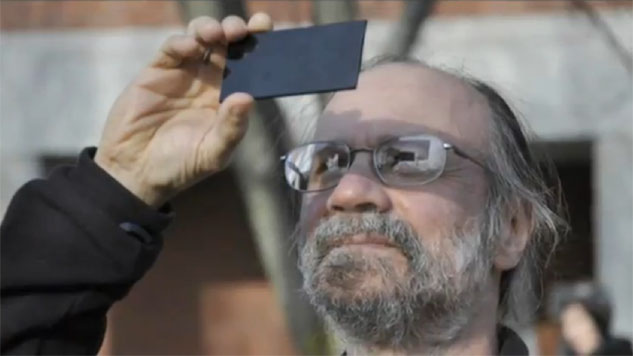
Tony Flanders
Alternatively, you can go to a welding-supply store and buy a piece of #14 arcwelder’s glass (as in the image above), which reduces sunlight enough for safe direct naked-eye viewing.
But no matter what, do not use other items such as smoked glass, stacked sunglasses, polarized filters, camera filters, candy wrappers, or compact discs. They might reduce the Sun’s glare, but enough harmful radiation can sneak through to damage your eyes. Only use materials specifically manufactured for safe solar viewing or #14 arcwelder's glass.
No Glasses? Use Pinhole Projection

Leah Tiscione / Sky & Telescope
The simplest safe method for viewing the Sun is to project the Sun's image onto a piece of paper. Poke a small hole in an index card with a pencil point, face it toward the Sun, and hold a second card three or four feet behind it in its shadow. The hole will project a small image of the Sun's disk onto the lower card. The projected image will show all the phases of a solar eclipse, just as the real Sun does. Experiment with different size holes: A large hole makes the image bright but fuzzy; a small hole makes it dim but sharp.
For a better view, you can reduce the amount of daylight shining on the viewing card or paper by enclosing the image in a box, such as a cereal or shoe box. This method lets you use a small pinhole, giving a sharp image.
Here's a much better way to do pinhole projection in order to look at the sun. Find a room with a Sun-facing window, turn out any lights, and pull the shades. Arrange for sunlight to enter through a small hole punched in a card near the top of the window. Set up a white piece of paper across the room to catch the Sun's image. Again, experiment with different size holes to get the best, sharpest view. (Of course, don't look through the hole directly at the Sun! Look only at the spot of light that falls on the paper.)
If the Sun is too high in the sky for this, you can direct its image horizontally into the room by setting up a small, high-quality mirror on the sill of an open window. Hold the mirror in place with modeling clay. Tape your card with the hole right onto the mirror.
Even at its best, pinhole projection gives only a small image. The "throw distance" in feet, divided by 9, gives the image diameter in inches. Pretty small!
Project a Bigger Image of the Sun

Leah Tiscione / Sky & Telescope
If you want to show the Sun to many people at the same time, you can use binoculars or a small telescope to project an image of the Sun onto a screen or white sheet of paper (almost any flat surface will suffice).
If you have binoculars, attach them securely to a camera tripod and cover one side. Point the other, uncovered side toward the Sun — but don't look into the eye end! Instead, let the sunlight fall onto a card behind the eye-end lens. A close-in card gives a brighter but smaller image, while moving it farther away makes the view bigger but dimmer.
A big telescope lets in a lot of sunlight, which poses the risk of overheating internal components. So either use a telescope with an aperture no larger than 4 inches or, for larger apertures, use an opaque mask over the Sunward-pointing end with a 3- to 4-inch-wide hole in it.
Remove the finderscope and place an eyepiece at the telescope’s focuser. Aim the telescope in the general direction of the Sun (without looking at the Sun through the telescope!) and move it around until sunlight streams out of the eyepiece. You’ll know when you hit the sweet spot!
Whether you're projecting with binoculars or a telescope, using a sunshade to block ambient light from falling on the projection surface will improve how you look at the sun.
How to Look at the Sun with a Telescope or Binoculars

Dan Engel / S&T Online Photo Gallery
If you want to observe the Sun through a telescope, there are many options. Because binoculars and telescopes concentrate the Sun’s blazing light, it’s even more crucial to use safe filters. Make sure to avoid any filter that is placed at the eyepiece end of the scope. The concentrated sunlight will probably destroy such a filter, followed shortly thereafter by your vision.
The easiest and least expensive option is to use a sheet of solar-filter material specially made for telescope use. Make sure to place the filter material at the front end of your telescope, and to cover the entire opening. If you plan to use a large telescope, no problem — simply create a mask with a 3- or 4-inch-wide hole and cover the hole with your filter material.

Rick Fienberg / Galileoscope, LLC
Many companies sell safe solar filters — often made of metal-coated glass or Mylar — that go on the front end of scopes, where they block more than 99% of sunlight before it ever enters the telescope tube. Here's a list of suppliers.
These filters show you the Sun’s visible surface (the photosphere) in its natural "white" light, though you'll see the disk as pale yellow, orange, or blue, depending on the filter type. They allow you to gaze at the Sun for hours with no risk whatsoever.
Make sure your filter is securely attached to the front of the scope, so there is zero possibility that it will come off while viewing. And to avoid damaging your finderscope, either remove it or place a cap or solar filter at its front end. Also note that safe solar filters work equally well with binoculars.
High-End Solar Filters for Telescopes

Sean Walker / Sky & Telescope
Last but certainly not least, many amateurs are currently using specialized solar equipment that allows them to observe the Sun at very narrow wavelengths, particularly the hydrogen-alpha line at 656.3 nanometers or the calcium-K line at 393.3 nanometers.
These are typically small refractors with modest apertures, 40 to 60 mm across, that have special built-in interference filters. It's also possible to buy filter sets that attach to the front end of a refractor's tube.
Such filters are rather costly, but they allow you to see different layers of the Sun, and they can provide spectacular views of prominences and filaments that you can’t see in white light. You’ll want to use these filters frequently for solar viewing even when the Sun is not being eclipsed or transited.
More Information on How to Look at the Sun Safely:
Find more information and resources — visit Sky & Telescoope's 2024 total solar eclipse portal.


Comments
You must be logged in to post a comment.